Curious about what do different camera lenses do? This is a practical guide that explains the different types of camera lenses as well as what you need to know before you buy a lens. If you’re looking for a more technical explanation check out this article on how a camera lens works.
The fun part of using a DSLR or Mirrorless camera is that you can switch out the lens and have control over your images. This comprehensive Camera Lens guide explains:
Article Outline
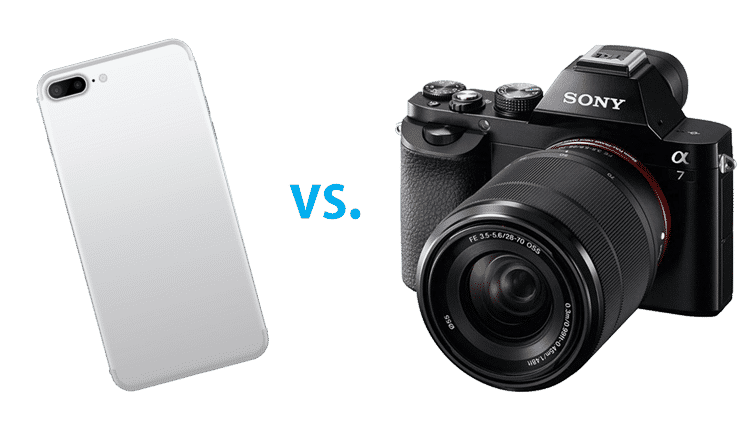
Table of Contents
ToggleThe Smartphone vs. The Digital Camera
The revolution and advancements of the Smartphone camera has given a camera to virtually everyone. (Even little kids!) So why would you buy a DSLR or Mirrorless Camera if you already have a Smartphone?
As convenient as your Smartphone or iPhone camera is it just can’t compare to the control you have over your photography when using an interchangeable lens camera.
Don’t get me wrong, I use my Smartphone camera just like everyone else. I’m also not about to start lugging around a big camera with me where ever I go. However, the camera phone just does not compare.

Think of it like a pair of shoes. You’ve probably got a pair of shoes that you wear just about every day. They are comfortable and you get a lot of use out of them. But what about when you go for a long run, or you’re planning to do some rock climbing? All of the sudden those everyday shoes just don’t give you the performance and control you need.
A DSLR or Mirrorless camera isn’t going to travel around with you every day but when you want to really do some photography or capture a special trip or event you’re going to love having it.
If you don’t have a DSLR or Mirrorless camera yet, check out our camera guides and recommendations.
As great as digital cameras are today, the camera lens is really what sets apart those professional looking photos.
Understanding the basics of photography is first and foremost in improving your photography but right after that is making sure you have the right lens.
For a better understanding of the basic photography terms our sister site, Smashing Camera, has some great tutorials and tips on Shutter Speed, Aperture. and ISO. I’ve also included some other resources for beginner photographers.
Resources for Understanding Photography
If you prefer learning from a book here are some of the highest recommended Intro to Photography books.
Recommended Photography Books
Different Types of Camera Lenses
In order to understand what camera lens you should buy for your your camera we’ll first explain the different camera lenses types you’ll come across. It can get more complicated than this but for now we’ll break it up into the following 5 types of camera lenses:
The categories listed above have to do with the focal length of lens, which we’ll talk more about later on.
The other aspect of a lens you’ll want to understand is whether the focal range is variable (aka: a Zoom Lens) or fixed (aka: a Prime Lens):
If you decide to click on our links to buy anything from Amazon or B&H, you automatically support us as we receive a commission and it’s what allows us to continue writing our guides.
What is a Lens?
Before we get into the different types of lenses let’s first discuss what a lens is.
Simply put, a camera lens is pieces of glass put together. These pieces of glass are then combined with other optical elements within the lens housing i order to fix any issues that arrive from bouncing the light so many times.
Some of the more common issues you’ll hear about are aberration and flare but there are many more that we’ll save for a later time.
Most phones and compact cameras have built-in lenses, meaning you can’t take them off. Although they generally have at least some digital zooming in or out.
For DSLRs and Mirrorless cameras (as well as more expensive professional cameras), you have complete control over the lens. This allows you to select the best lens type for the situation by simply switching out the lens on the front of the camera.
To do this you simply hold a button on the camera, unscrew the lens, and mount a new one on.
When purchasing a DSLR or Mirrorless camera, making sure you select one with a good sensor (the part that translates the light into your photo) is very important. Although it’s actually the lenses that makes a huge difference in how the image turns out.

If your near or far-sighted a very simple analogy are the glasses you’re wearing. The glasses have nothing to do with the actual processing of the images in your brain, but take them off and it’s clear the benefit they provide to enhancing your vision.
Most digital cameras, since about 2012 are really great, so if you already have one chances are it’s a good one. Whether it’s a basic DSLR or one of the newest Mirrorless cameras if you want to take your picture to a new level, it’s usually best to first get a better lens.
Since every camera lens company has so many lenses to choose from, plus all the third-party lens companies, you’ll need to know how to filter down to what you want. (These third-party lens company make lenses for all the big brands.)
Lens Focal Lengths
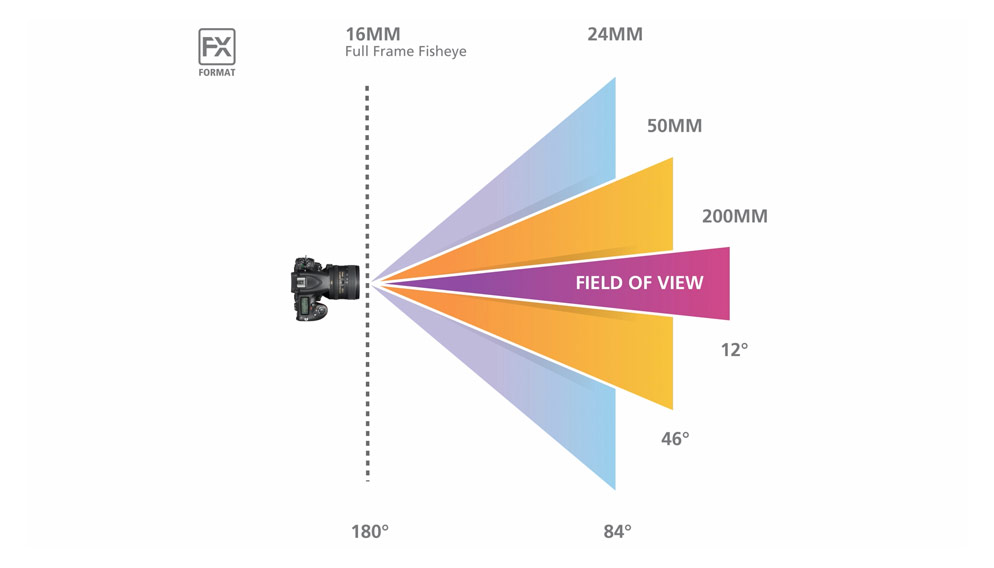
Ever wondered what is the difference between wide angle vs telephoto lenses?
Focal length is the name we use to tell how wide or long a lens can “see”. This is the first distinguishing characteristic of a lens. You’ll see that the focal length is marked in millimeters.
A good way to think of it is the greater the number, the further it ‘sees’. You will see numbers like Canon 50mm, or even Sony 24-70mm (meaning it can go from 24mm to 70mm by zooming).
Most photography happens in the Standard or Normal range. Though there is some overlap into the wide angle and telephoto ranges.
Between 18mm and 120mm is where most of the shots are taken, for both beginners and professionals.
There are no rules though, in other words you can shoot landscape with telephoto, and use a wide angle for animals in nature. However, these are just helpful references for focal lengths that work in 90% of cases.
- Wide Angle: From ~8mm to 35mm
- Standard: From 35mm to ~85mm
- Telephoto: From 85mm and all the way up (even to extreme numbers like 600mm).
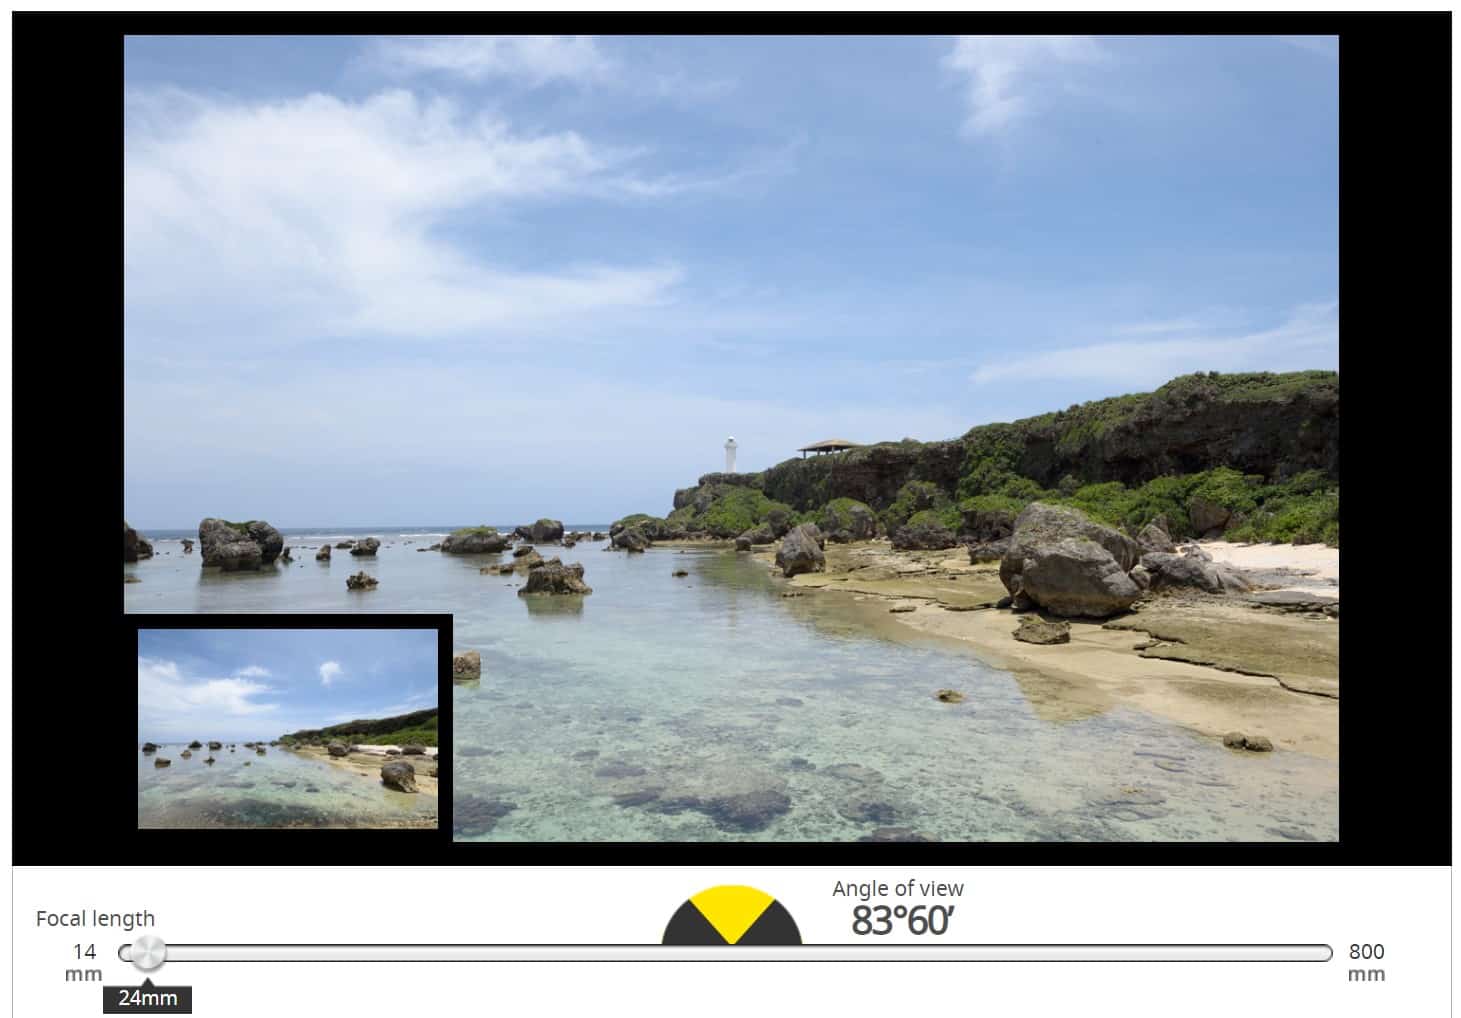
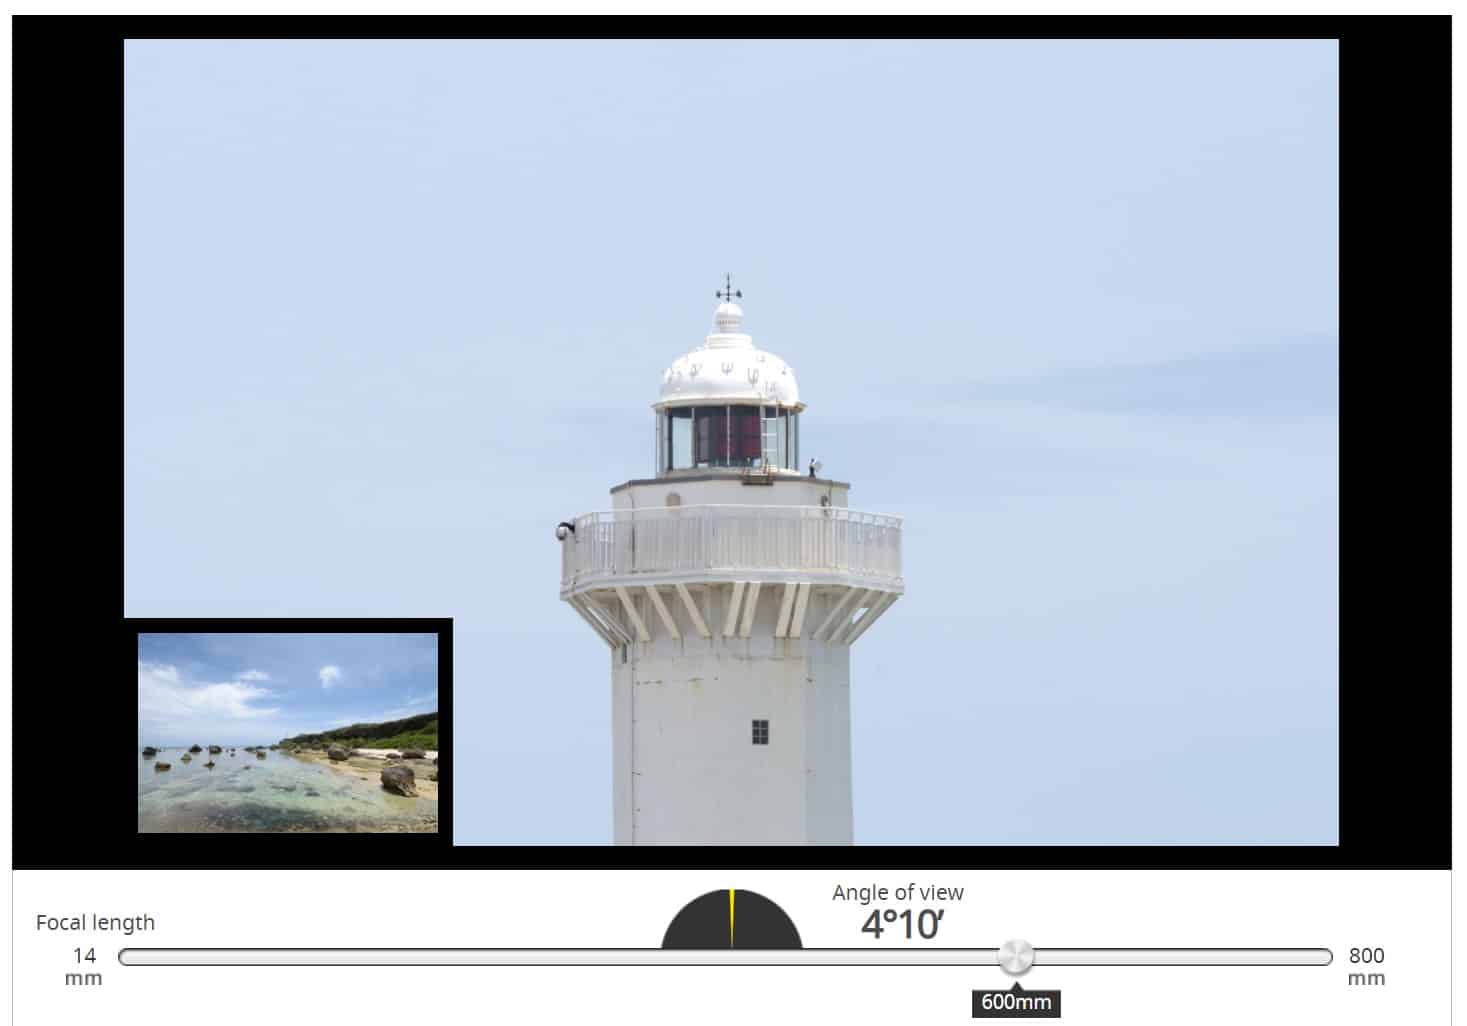
Until you have some experience with the different focal ranges it’s kind of hard to have a feel for what these numbers really mean. For example, the difference between a 24mm and a 600mm focal length is huge!
To illustrate this difference, here are some screenshots from Nikon’s Lens Simulator Tool.
24mm Focal Length

100mm Focal Length

600mm Focal Length

See how much difference there is between 24mm and 600mm! Try getting that close with a Smartphone.
In addition to being able to see something far away, look back at the half circle right above the focal length scale in the images above.
This represents the angle of view you get with a given focal length. Particularly with the smaller focal lengths, like 24mm, it’s easier to understand why they are referred to as “wide angle” since you have a much wider view on the scene in front of you.
Nikon has put together a nice article on understanding focal lengths if you are looking for more information.
Lens Type #1: Wide Angle Lenses

What’s important when looking for a Wide Angle Lens?
First let’s begin with what types of photography and situations you’d want a Wide Angle lens for:
When You’d Want a Wide Angle Lens
- Capture Landscapes
- Big Environments
- Large Group Shots
- Indoors, such as real estate photography
A wide angle lens is great for basically anywhere you’d want to capture as much of the scene as possible. Look back to our discussion on focal lengths earlier in this article and compare the angle of view between the focal lengths at 24mm and 100mm.
For example, if you are planning to take pictures indoors, having an ultra wide lens that allows you to capture the entire room is key.
What Focal Length is Considered Wide Angle?

Anything under 24mm is a must for wide angle shots, though most photographers will rarely want to go below 12mm or 14mm as most wide angle lenses show too much distortion at that range.
When you’re under 24mm it is considered an Ultra-Wide Angle lens.
The difference between a 14mm and a 16mm lens may not seem like a lot on paper, but when dealing with such small numbers, every millimeter makes a difference. This is especially important if you’re shooting in tight spaces and don’t want to do panoramas (real estate photography for example).
Anything up to 35mm is considered wide angle, but the size of your sensor is also important. This statement holds true for Full Frame cameras, but if you’ve got an APS-C then you need to multiply the focal length.
For example with a Canon APS-C you’ll multiply the focal length by 1.6x to get the actual field of view (Nikon is a 1.5 crop factor). All of a sudden, your wide Canon 28mm lens now becomes a 45mm lens!
28mm Focal Length x 1.6 Crop Factor = 45mm Lens Equivalent
Luckily lenses that are designed for APS-C mounts take the crop factor in mind. Meaning that when you mount them on they’re still wide enough for everything you want, despite the crop factor.
RECAP: Under 20mm is considered extremely wide; 20-35mm is wide; over 35mm is normal.
What Aperture Do You Need for Wide Angle Photography?
Plan on using your wide lenses mostly outdoors during mid-day when it’s sunny? If your camera is good at high ISO speeds and you don’t have much of a need to blur the background then there’s no need to buy a lens with a f/2.8 aperture. Something with f/4 should be fine. (We talk more about Aperture later on in the article as well.)
On the other hand, if you shoot indoors and want to stick to low ISO levels, then in order to get the cleanest images you’ll want to have a big aperture.
This is especially true if you’re into astrophotography. Prime lenses are often better choice if you need that larger aperture, since the cost for a bigger max aperture is usually lower.
If you shoot in low light often, lets say around blue hour or into the golden hour then a lens with f/2.8 or bigger is recommended to give you more control.

Is Auto Focus Important on a Wide Angle Lens?
Generally speaking, most photographers use wide lenses for landscape and more static subjects. Quite often, you use manual focus simply because you can.
Most photographers that are into Landscape Photography prefer the control of manual focusing to refine what’s in focus. When combined with the Live View feature and a tripod, it’s easier to make sure your focus is spot on.
However, that doesn’t mean auto focus is not important here.
Sometimes you simply don’t have enough time to do all of that, and not everyone shoots nature only. Many use them as walk-around lenses, or for weddings, clubs, group shots etc.
Weight & Size Consideration for Wide Angle Lenses
Extreme wide angle lenses have a big front element and heavy glass. So if you travel and hike (or just dislike carrying around a lot of weight) you’ll have to find the compromise between the weight and focal length (zoom or prime) offered.
There’s no point in owning an optically superb, but heavy lens, if you never find the reason to take it out because you don’t like carrying it.
Speaking of weight, if you don’t want to carry a tripod with you but would still love something to add extra stability, check out a monopod.

The dimensions and weights for Wide Angle lenses are nothing compared to Telephoto Lenses (which are about double), but it’s still something you shouldn’t forget when making a purchase.
The average Wide Angle Lens is 1.16 lbs compared to 2.5 lbs for the average Wildlife (Telephoto) Lens.
For most photographers, the goal is to have a wide angle lens that is well suited for a ‘wide‘ variety of photography; landscape, architecture, indoors and interiors, nature, astrophotography, etc.
Lens Type #2: Standard or Normal Lenses:
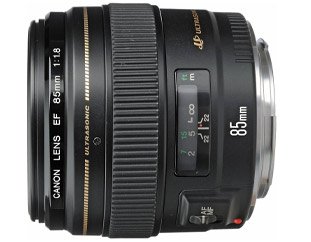
As a reminder, the Standard Focal Length range covers 35mm to ~85mm. This accounts for about 50% of the most common focal lengths that beginner and professional photographers use.
When You’d Want a Standard Lens
- Portrait Photography
- Weddings and Events
- Product Shots
- Street Photography
- For Traveling
- Everyday Moments
- Just About Anything
Standard lenses are closely aligned with what our eyes see, in terms of distance and viewing angle. So they are also commonly called “Normal Lenses”.
Prime lenses in this range are affordable and have a big aperture so you can easily blur the background.
You’ll often hear the term ‘all-around lens’, which does exactly what you think it would; something you can take with you regardless of where you’re going.
A lot of casual photographers prefer owning one ‘do it all’ lens. Which can be a great choice if you travel often and can’t carry around a bunch of different lenses.
Plus when traveling, you might not always have the time to switch out a lens. Either because of limited time to capture the moment or risk of getting your gear wet/dusty.
This is why a Zoom lens with a decent focal range is a common choice, and often included as a kit lens with many cameras.
Although there’s one drawback.
The quality of a ‘do it all’ Zoom lenses is not nearly as good as a quality Prime lens. We’re not saying they suck or anything, but their apertures are nowhere near as big and quality differences can be seen when viewing your images as bigger prints.
This is because a Zoom lens needs to have so many different elements inside, to allow it to move and give you different focal lengths, that you can’t expect to get the highest quality at a comparable price.

Many cameras come with a “kit lens” which is often in a 18-55mm focal length. Since this is in both the wide angle and standard focal ranges you may hear it referred to as an “inbetweener” lens.
This is a nice range for a lot of photography, but the apertures are usually f/3.5 – f/5.6, which will limit the quality you’ll get in some situations.
An upgrade from a kit lens to another ‘do it all’ Zoom would be a 24-70mm. You do loose a little in the wide angle range but you pick up increased depth of field from the 70mm and can find apertures of f/2.8 or larger (with aperture smaller numbers mean a larger aperture).

A Sony FE 24-70 mm F2.8 GM lens was the first lens I rented and I just loved how versatile it was for getting both landscape and candid shots in a trip I took to Moab, Utah.
We cover the pros and cons of Zoom vs. Prime Lenses further on in the article. Both are great, as long as you understand their differences.
Typical Focal Length for Standard Lenses

Remember that that 35mm to 85mm range for Standard or Normal Lenses needs to account for the type of Camera and Lens you’re using.
If you have a Full Frame camera and lens then what ever focal length is listed on the lens is what you’ll get.
But if you’re using a APS-C camera with a lens designed for Full Frame you’ll need to do that math to determine the crop factor, which is a 1.5x factor for most and 1.6x for Canon.
If you have a APS-C camera and a APS-C lens then you don’t need to worry about the calculation.
What Aperture Size Do I Need?
While the answer to this is dependent on what type of photography you are doing and what results you want, in short bigger is better.
That’s mainly because with lenses in the Normal focal range you’ll have more freedom and flexibility with whatever conditions get thrown at you. Although don’t don’t feel like you have to be at f/2.8 or bigger to get good photos.
Later on in the article we talk about getting to the right exposure using the ‘Exposure Triangle’ as a guide. But to sum it up, you can make adjustments to other settings in order to compensate for a smaller aperture if you need to.
For example, most Zooms that are perfect for traveling have aperture sizes that slide from f/4 to f/5.6 as you zoom.
Sometimes you’ll see a third stop smaller or bigger values, but generally speaking this Aperture range results in the best combination of price, quality, and reach.
More expensive Zoom lenses have fixed apertures, meaning if you zoom all the way, the opening doesn’t get smaller. While, the less expensive ones usually stop down by 1 f-stop.
In short, f/4 to f/5.6 are perfectly good apertures sizes for Zooms, while f/1.8 to f/2.8 is the standard for Primes.
How Important are Image Stabilization and Auto Focus?
Based on the wide range of photography that happens in the Standard focal range we think that both are a must!
For example, if you’re traveling or hiking having optical stabilization in your lens is going to help you get more quality shots. If you’re on the move and don’t have a lot of time to play with your camera settings these two features are invaluable.

There’s nothing worse than looking at your photos and seeing that the great moment you captured turned out blurry or out of focus.
These two characteristics are probably more commonly associated with the term ‘point-and-shoot’.
Although it’s important to know that Auto Focus isn’t what’s going to keep your action photos from being a blur of motion. That is controlled by the Shutter Speed.
Some newer cameras include in-body stabilization but it’s generally more commonly found in a lens.
Considerations for Size & Weight for Standard Lenses
A very important question you should ask is how light and small does the lens need to be for you to use it?
As we’ve mentioned before, if your setup is more than you’re willing to carry around then it doesn’t do you much good. No matter how good the gear is.
For some that question may be determined by the number of lenses. As an example you may only want to have to have one lens.

While others may determine that the size/length of the lens needs to be really short and compact.
In the first instance, owning a ‘all-in-one’ Zoom may be the best option while in the second case a compact Prime would be more tempting.
You’ll also want to consider the weight balance between the camera and the lens. For instance, Sony’s cameras (Mirrorless) are considered pretty small and lightweight compared to standard DSLR systems.
So you have to be more specific when choosing a lens because a small body with an enormous lens might make it uncomfortable to balance.
Lens Type #3: Telephoto Lenses
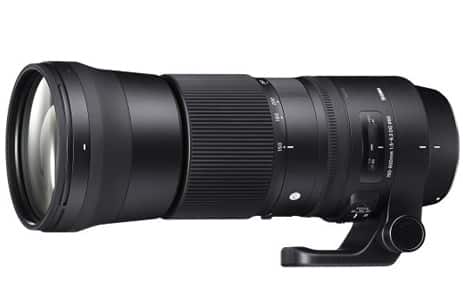
If you’re just starting with photography you may share this question that I had ‘What is a Telephoto lens used for?’
Put simply, a telephoto lens allows you to get closer to your subject, while you’re at a distance. The actual distance or detail you get from the lens will depend on the focal length.
Here are those same lens simulator screenshots from earlier in this article put side by side. The distance and detail you can ‘see’ in a 600mm lens is pretty incredible when compared to a 24mm lens!
When You’d Want a Telephoto Lens
- For Far Way Subject
- Sports Photography
- Close Up Images of Wildlife
- Triathlons and Races
- Concerts and Events
- Birding Photography
- Portraits (or when you want a blurred background)
With each of these types of photography having a telephoto lens is a must.
Quick Photography Tip
One quick note on blurred backgrounds. This effect is referred to as “bokeh” and also associated with the term “depth of field.” The best way to achieve this professional look is a combination of a long lens (aka: telephoto) and a wide aperture (meaning a smaller number, f/2.8 or lower).
We talk about aperture and depth of field in more detail further on.
In some cases you want to get close ups without distracting anyone or being in the way. While in the case of wildlife photography you may just not want to be eaten by that lion out on the African safari!

The main purpose of a telephoto lens is to get you closer to your subject. In photography terms this means you are using an increased focal length.
You’ll see telephoto lenses most commonly used in things like Sports and Wildlife photography, since these are situations where you can’t very easily just walk up and get a close up.
Weddings are also a good use for a telephoto lens. It allows you to capture some cherished family interactions without feeling like you’re interrupting.
Another use of a telephoto lens is for artistic purposes. This is because it allows you to create a contrasting image between a focus of the foreground and your background (aka: bokeh).
Here’s a table with a general break down of the focal ranges you’d want based on you’re type of photography.
| Type of Photography | Typical Focal Length |
| Birding Photography | 400mm – 600+mm |
| Concerts and Events | 70mm – 200mm |
| Portraits | 85mm – 135mm |
| Outdoor and Indoor Sports | 100mm – 400mm |
| Triathlons and Races | 85mm – 300mm |
| Wildlife and Animals | 200mm – 400mm |
Please note that these focal ranges are just starting points, different focal lengths can be used depending on what gear you have available and what you’re trying to do. Also Telephoto lenses can be used for other types of photography than what we’ve mentioned. Don’t let the numbers limit your creativity!
Is there a difference between a Telephoto lens and a Zoom lens?
Which is better, a telephoto or a zoom lens?
Notice that we’ve been very careful in this section not to use the word “Zoom” yet. That’s because Zoom and Telephoto are NOT the same thing. Although many people casually use these terms interchangeably.
Knowing that Telephoto and Zoom lenses are not exactly the same thing will help when you’re looking at the difference between camera lenses, since they are referring to different things.
The term Telephoto really is just referring to a lens that has a ‘long reach’. This typically translates to something longer than 70mm. Where as a Zoom means a lens that can achieve a range of focal lengths.
Quick Disclaimer
If you’re keeping track of focal ranges, you’ll notice that 70mm also falls within that ‘Normal Focal Range’ we mentioned in that last section. That’s okay, there aren’t really any hard and fast rules that you need to worry about.
You can break down focal lengths into more granular categories but for simplicity we’ve kept it a little more general. Also the only purpose of these groupings is to give you a reference point.
The heart of photography is really about having an understanding of the tools available and documenting the moments and things you love. So don’t get too caught up in numbers.
So here are a couple of examples…
Is a 85mm Prime lens a telephoto lens? The answer is Yes! Since you have a ‘reach’ or focal length of 85mm this falls into the range of what is considered telephoto.
Is a 10–100mm Zoom lens a telephoto lens? Here the answer is Yes and No. While it would still probably be called a telephoto lens, since some of the focal length range is, there are also parts of the range that are not considered telephoto.
All this really means is if you see the word ‘Telephoto’ associated with a lens is that it will help you get closer to the action without you actually having to be close to the action.
This lens is considered a ‘Zoom lens’ simply because you have multiple focal lengths available in the same lens.
Recap: Telephoto is a term that refers to the focal length being at a certain distance (usually above 70mm). Zoom is a term that refers to whether or not the lens has multiple focal lengths (usually seen listed as something like ’24 – 70mm’).
Aperture Sizes for Telephoto Lenses

The aperture on most Telephoto Zooms usually end at around f/5.6. More expensive Telephoto Primes have f/4 apertures, while the most expensive and biggest feature a f/2.8 aperture size.
All 3 aperture sizes are perfectly okay for most telephoto photography, especially with how good new DSLRs and Mirrorless cameras are when it comes to high ISO shooting.
As a reference, both f/2.8 and f/4 are excellent for shooting in all sorts of conditions, but with f/5.6 you will have to raise the ISO speed a little bit if not shooting on a bright sunny day.
Using the example of a Telephoto Wildlife lens, you’ll want an aperture that’s big enough to be used when there is not a lot of light.
Animals are often the most active in dusk and dawn, then couple that with rain and other bad weather conditions, and you’ll wish you spent a little bit more on a lens that has a larger aperture and is also properly weather sealed.
Because of all the elements and mechanics in the lens you typically are going to see smaller apertures. (Or bigger price tags with bigger apertures!)
As we mentioned above, the apertures on many telephoto lenses are usually between f/4 and f/5.6. With well lit conditions this can work, but this is not good for indoor action so you’ll need to remember to raise the ISO up to 1,600 – 3,200 to get more acceptable shots.
Do I need Image Stabilization and Auto Focus for a Telephoto Lens?

The short answer, Yes. Fast auto focus with reliable accuracy is a must for shooting fast sports or animals.
Because telephoto lenses tend to be a bit heavier and also get you close to the subject, you’ll want to make sure you get one with Vibration Reduction (VR). You may also see this referred to as ‘Image Stabilization’, just depending on the terms the brand uses. This feature compensates for slight movements you might make if you’re not totally stable and makes the shot less blurry.
However, vibration reduction won’t help if your main subject is moving fast, that’s where a faster shutter speed comes in.
Remember that Vibration Reduction is useful to have if you plan on shooting for hours, or are shooting at a long focal length. When you’re zoomed in on a far away subject even just a little bit of movement can have a big effect.
Even a telephoto lens with the best optical quality, for say wildlife photography, is quite useless if it has a bad autofocus.
Animals are constantly on the go, and even when they’re still you still need a lens that can quickly and accurately acquire focus. Ideally the lens should also track the subject as best as possible, allowing you to take a ton of shots and then later filter out the ones you want to keep.
If you have a Canon, the more expensive Canon L lenses offer amazing auto focus accuracy, as well as speed and performance. They’re often used by sports and action photographers in both low light and outdoor situations.
Your camera plays a big part here as well. But in order to get the best of your camera make sure to get a lens with a USM motor or something equivalent, for example Sigma’s HSM motor. USM stands for Ultra Sonic Motor and these types of motors are quick at focusing and nearly silent.
What is the Weight and Size of a Telephoto Lens?
Because of their reach Telephoto lens are longer and heavier than your Standard lens. This translates to about 3-4 more inches and about 1-1.5 lbs more weight on average.
The difference of course depends on what you’re comparing but as you’d expect, the longer the focal range the longer and heavier the lens will be. Going with a Telephoto Prime over a Telephoto Zoom will save you some weight.
This is also an instance where an APS-C or Crop Sensor camera can help you out. As we’ve mentioned, most APS-C Cameras have a 1.5 crop factor. This means you get an increased focal length from a full frame lens over what that lens would get on a full frame camera.
So a 100mm full frame lens on a APS-C Camera is equivalent to 150mm focal range, allowing you to get more ‘reach’ with a lighter and smaller Telephoto lens.
The average Telephoto Lens is about 6.65 inches long and weighs about 2.5 lbs.
Lens Type #4: Macro Lenses
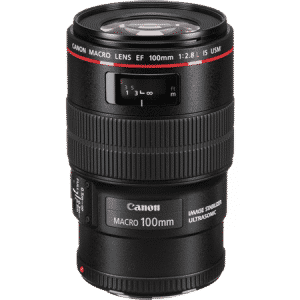
Ever wish you could shrink down and see the world from a different perspective? A Macro lens let’s you do that without all the hassle of a shrinking ray.
A Macro lens makes your subject appear at it’s true-to-life scale because the glass is magnifying the subject so it is captured at a 1:1 ratio.
The placement of the lens elements also allow you to focus on things really up-close. Which is why Macro lenses are used for things like photos of insects or jewelry.
You may see some Zoom lenses with the word “Marco” in the name, although these are not true Macros. They use the term to indicate that you can focus up closer on your subject than other lenses. Although if you want a real Macro then you’ll need to make sure it’s a Prime lens.
When You’d Want a Macro Lens
- Extreme Close-ups
- Jewelry Product Photography
- Flower Detail Shots
- Insects and Bugs
- Water Droplets
- Up Close Portraits
Quick Photography Tip
Most often you’ll see the word ‘Macro’ in the name of the lens to help you easily identify it. However, as we mentioned above, make sure it’s a Prime or Fixed lens. If you have a Nikon camera you should know that they use the word ‘Micro’ instead, but it means the same thing.
When buying a macro lens, there’s one thing you never have to worry about and that’s sharpness. We couldn’t find a single true macro lens that would be bad and that includes a ton of third-party options as well.

As a kind of specialty or niche type of lens there are somethings you’ll need to be aware of:
- Although Macros are designed to have a shorter minimum focus distance the actual distance will depend on the lens’ focal length. In other words, the longer the focal length the further away you’ll need to be to focus on the subject.
As with other types of lenses this has a benefit. Particularly with bugs and other live creatures. If you’re able to be further aware from them you’re less likely to scare them away. - Macro lenses have a very limited depth of field if you are focusing at close range.
In order to counterbalance this you’ll just need to use a smaller aperture, which will help more of the scene be in focus. Possibly as small as you can go. - Another option you have for getting the full subject in focus is a technique called “focus stacking“.
Some cameras have this feature built in, but essentially you are taking several photos all with different focal distances and then combining them together to create a single image. - You may need to switch over to manual focus for some shots. Depending on the camera and lens’ autofocus system it may just be easier to manually dial in on exactly the spot you want.
Since a Macro lens gives you such sharp, detailed images making sure your focus is spot on is key to a professional looking image. - Since you may be forced to limit the light intake by using such a narrow aperture you’ll either want a tripod for longer exposures or supplemental lighting, such as an LED ring light, to help you get the correct exposure.
- In addition to a tripod to help avoid camera shake, you can use a cable or electronic shutter release. These allow you to snap a picture without physically touching the camera, so you can avoid accidental movement.
Another option would be to use your camera’s built in timer so that it take the picture after you’ve taken you hand off the camera.
Lens Type #5: Super Zoom Lenses
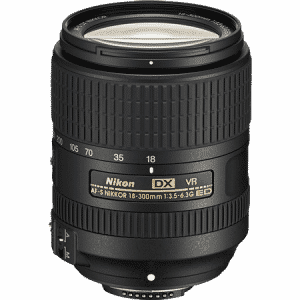
Simply put, a Super Zoom Lens is just one that covers a big range of focal lengths.
This is often from something wide to a long telephoto, such as 18mm – 300mm. Although this is not a hard-and-fast rule.
When You’d Want a Super Zoom Lens
- All-in-one Travel Lens
- General Purpose Photography
- Nature Photography when Hiking
- Wildlife Photography
Since the lens has to have so many elements in it to give you such a wide range there are some image quality trade-offs.
For example, most of the time you’ll see the maximum aperture at a f/5, and often you’ll see two numbers such as f/5-6.3. This means that it has a sliding aperture rather than a constant one. So as you zoom in with the higher focal length you’re aperture will narrow.
Image sharpness is also something that will drop off with a Super Zoom.
These aren’t deal breakers, but they are the consequences of going with an all-in-one.

Those that are most likely going to purchase a Super Zoom lens are mostly concerned about convenience and compactness. And in that area Super Zooms really shine.
Being able to go from shooting a beautiful landscape at sunset to capturing a detail shot of an eagle perched on a distant tree, all with just the turn of your lens is pretty awesome!
Zoom Lenses Explained
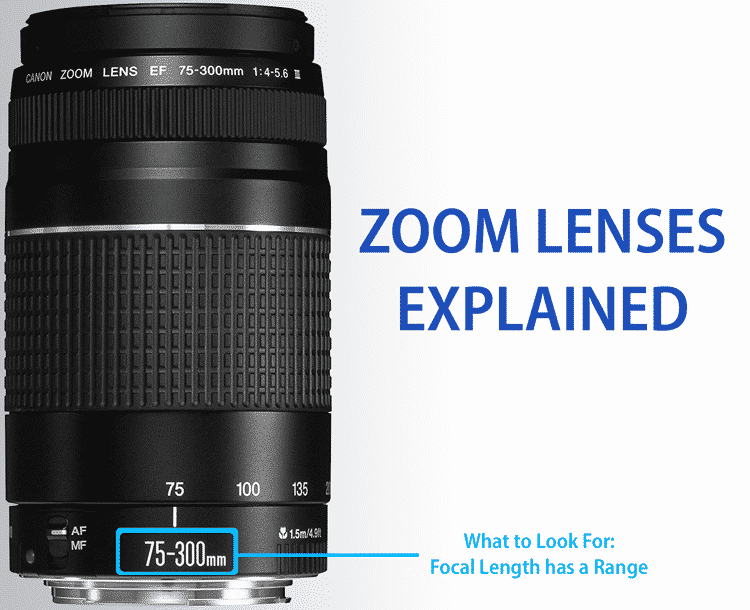
Zoom/Variable: Focal length can be changed by twisting the zoom ring on the lens. For example, Nikon 24-70mm or Canon 75-300mm is what the name would look like. You can go from 24 to 70mm (and any number in between) by simply twisting the zoom ring.
The Good and Bad with Zoom Lenses
- Much more control over the framing of the shot, you don’t have to move as much, simply twist the ring and you are closer or further.
- For beginners, zooms are usually much more friendly since you are exploring and don’t even know what you need. In many cases, you also have little control over the environment; you might be traveling, and you want to be able to take a picture of something close to you, but then a second later you see something far away, and with a zoom you can take pictures of both with no problems.
- The lens has more elements inside, and that (usually) results in worse image quality, and can bring more issues on the shot. It’s not bad or anything, it’s just not as good as the more expensive options.
- They tend to be bigger and heavier, but if they’re really cheap and not even bigger and heavier, then there is definitely a compromise in image quality.
- If you want a quality zoom, they can be quite expensive
- An important reason why some shots look amazing is because of the actual distance of the photographer to their subject. Zooming can make you lazy, and sometimes walking to/away from the subject makes the shot much more appealing. Take a look at this gif and look at how the face looks nicer and more compressed as the focal length increases
Take a look at this gif and look at how the face looks nicer and more compressed as the focal length increases.
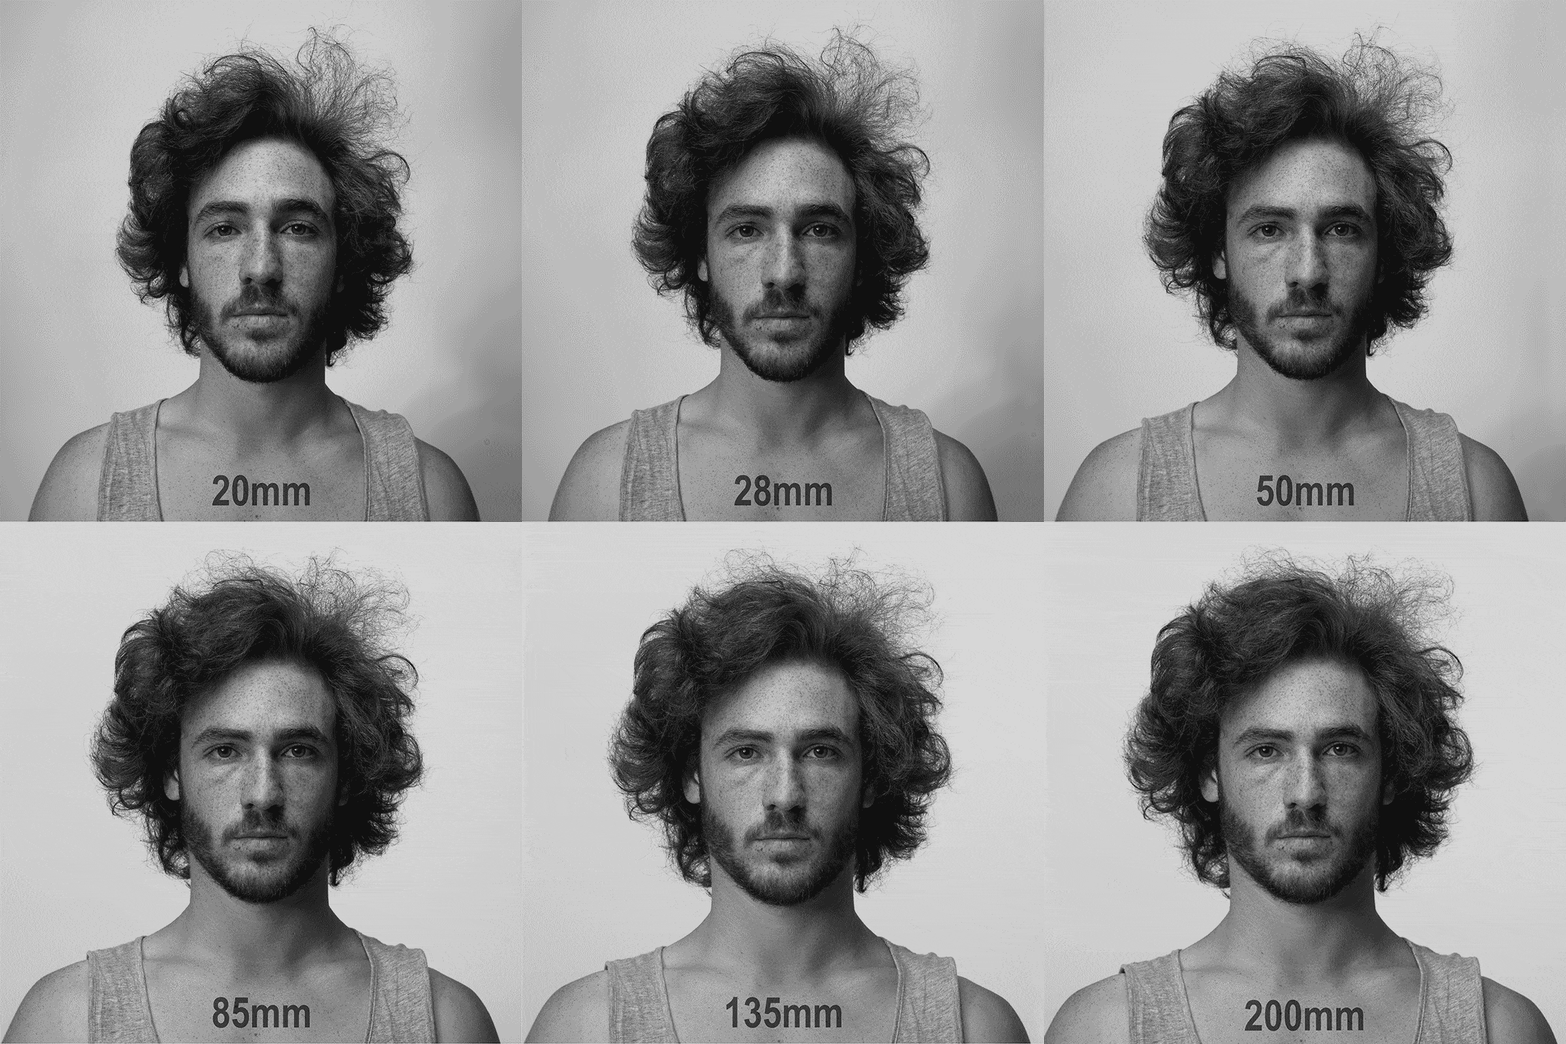
You’ll notice at the lower focal lengths the face looks narrow and unnatural. For most Portrait photography head shots you’ll see photographers using at least 85mm.
Quick Portrait Photography Tip
With a wide angle lens (24mm or less) you need to be really close to your subject, which ultimately distorts their faces (as seen in the above gif).
For portraits, stick to 35mm to 200mm and your clients will be thankful as their faces and bodies will look normal.
- 35mm lenses are great for large group shots or showing more than just your subject isolated (perhaps their workplace, the environment, streets, nature and so on).
- 50mm lenses are ideal for full body shots and casual shooting
- 85mm lenses have the perfect combination of focal length and bokeh, and are also most usable for head shots
- 135-200mm lenses are best for when you can’t be too close to your subject, or you’re looking for the most background blur and flat faces due to such long lengths.
Most portrait photographers use a 50mm and/or a 85mm lens.
Prime Lenses Explained
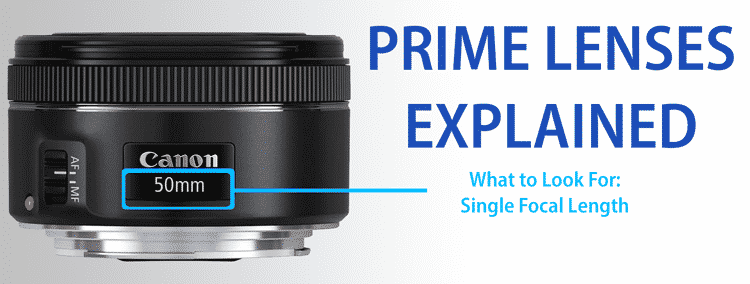
Fixed: The lens is always at one focal length, you can never change it. For example, Sony 50mm or Canon 85mm is what the name would look like.
The Good and Bad with Prime Lenses
- Much less glass elements, therefore the image quality can be outstanding
- Smaller, lighter
- When talking about lenses under ~$600, they usually give more bang for buck than zooms. A cheap Canon 50mm goes for $100 and blows the kit lens (one that comes with the camera) out of the water, even though they are both worth almost the same
- The aperture can be much bigger
- Less control. Pretend you’re at a wedding, and you only brought a 50mm lens. It’s okay for portraits, but then everyone wants a group shot, your 50mm is going to be too “long” and you won't be able to capture the whole scene.
- Depending on your type of photography you may have to carry around several lenses
- Less convenient. You'll have to be moving around more to frame your shot.
With the wedding example about you can fix this issue by owning 2-3 Prime lenses, or by having a combination of one Zoom and a few Primes. We’ll talk more about this down below.
Should I Buy a Zoom Lens or a Prime Lens?
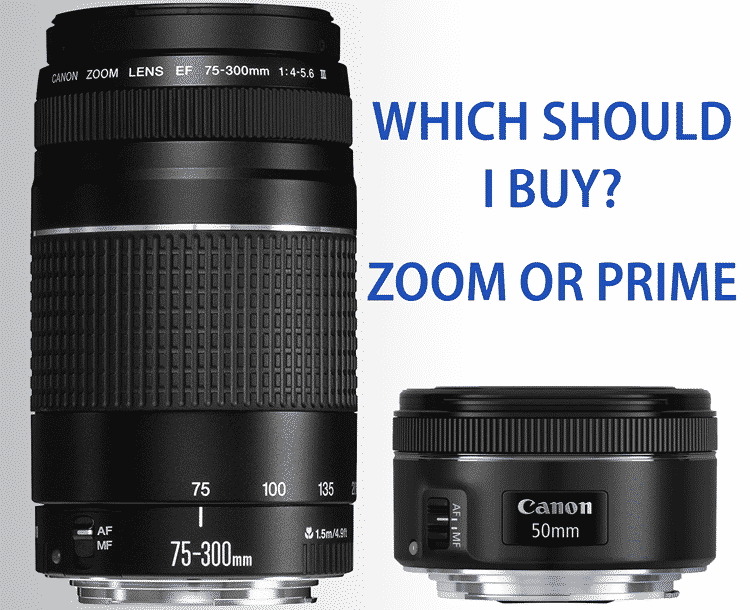
Both Zooms and Primes are great. In fact, most photographers have a combination of both.
Primes are more common among professional photographers since they usually are sharper and have larger maximum apertures.
While a Zoom lets you get close to your subject without intruding and makes it much easier to quickly frame a shot.
A popular setup is to have one Zoom that can cover the basic ranges (like 18-55mm, or 18-135mm) and then a Prime lens somewhere in that range, for when you want better quality.
Real World Illustration
A good example would be someone who uses their 18-135mm Zoom lens to take pictures of dogs. After awhile they see that most of their shots are taken within the ~40mm-60mm range.

The most common Prime lenses in that range would be a 50mm. By purchasing a 50mm Prime lens in this range that they take a lot of photos they can improve their image quality.
This is due to obvious image quality improvements they would find on the 50mm Prime over their standard Zoom. Such as better performance from a larger aperture and more sharpness from the glass in a Prime lens. Plus, because of their experience they would know exactly when to switch to the Prime and use it.
In summary, to make some simple stereotypes:
Zoom Lenses Are Great If…
- You are new to photography and aren’t sure what focal range you want
- You are traveling and don’t want to carry too much with you
- You prefer the ease of ‘zooming’ in and out rather than having to move around to frame your shot
- There’s a risk of damage to your gear from having to change lenses in bad weather/conditions
Prime Lenses Are Great If…
- You are looking for the best image quality
- You have a go to focal range that you use all the time
- For traveling you want a really lightweight compact lens
- You want the best value for image results compared to price
Photography Terms to Know
Before we move on to what the numbers on lenses mean we’re going to make one more plug for understanding some key photography basics.
The three main things to know about are Shutter Speed, Aperture. and ISO. These three elements make up what is known as the ‘Exposure Triangle’. This basically helps you determine the balance you need to get the correct exposure for your images.
For more information about the relationship of these three elements check out the video below or this article from Fujifilm.
In other words, you use Shutter Speed, Aperture, and the camera’s ISO to control how your images turn out. Meaning they aren’t too dark (under exposed) or too light (over exposed).
As we mentioned early on one of the best things about DSLR or Mirrorless cameras is the ability to control the outcome of the image.
A camera allows you to capture a moment, but a DSLR or Mirrorless camera will let you control what you capture.
The right balance of light and dark is what creates the perfect exposure. Each of the three elements of the Exposure Triangle allows a degree of control to adjust the level of light hitting the camera sensor (the part that translates the rays of light into your image), so let’s briefly discuss each.
- Shutter Speed – This is basically how long the shutter is open. So given a certain amount of light, the longer the shutter is open the more light hits the sensor.
- Aperture – This is an opening in the lens that allows more or less light to enter the camera. Almost like opening or closing curtains on your window.
- ISO – This term relates back to the days of film and essentially means how sensitive to light the film negative was. In a digital camera it is similar. ISO relates to how light sensitive the sensor settings are.
The Shutter Speed and ISO setting are more camera specific settings and specifications so we won’t go any further into those in this post.
However, the Aperture is one of the key lens attributes so we’ll dive into that more.
What Does the Aperture Do?
The aperture controls how much light the lens lets through to your camera’s sensor. It’s basically a hole in the lens that you can make bigger or smaller by changing the dial on the camera.
The numbers (written as f/_) might be confusing at first, but the greater the number, the smaller the aperture opening. As you can see below, f/22 is much smaller than f/2.8.
How does this work in actual shooting, and what are the good and bad sides of it? Remember, almost any change you make in photography has a good and bad effect to it.
Specifically for aperture you can ‘open it up’ (meaning using a larger aperture that will let more light in) to allow for more light. Or you can reduce the aperture to limit how much light is hitting the sensor. Again the goal being the correct exposure (balance of light and dark).
Here’s a quick reference.
- Big Aperture = Do you need more light? Simply open up the aperture, meaning make the opening bigger. Let’s say you went from f/8 to f/5.6. This lets in twice as much light as before (Remember the “stop” term? Going from f/8 to f/4 would be 2 stops, meaning you’re letting in 4 times as much light).
- Small Aperture = Is it the middle of the day and there’s too much light? Make the aperture smaller to prevent as much light hitting the sensor and ‘over exposing’ the image.
In addition to controlling the amount of light, aperture is one of the ways you can control the Depth of Field for your image. Depth of field is essentially how much of the scene is in focus verse how much is blurred.
The out of focus part is called “bokeh”. It gives the eye somewhere to look at, without distracting from the main subject.
Often for landscapes you want to have everything be in focus, both the foreground and the background. While most of the stunning portrait shots you’ll see have the person in focus and the background is blurred.
Using a larger aperture will give you a shallower depth of field, meaning blurred background or foreground. While using a smaller aperture will make more of the scene be in focus.
Depth of Field is what often makes a shot look more professional. The depth of field you get from f/22 (or lack thereof) gives you results that look like a basic phone/compact camera picture. This is because that type of gear can’t open up as much as actual DSLR or Mirrorless lenses.
Using an aperture of f/4.0 and bigger will make your images look much more professional.
So simply by using a big aperture you can actually make even the most boring subject look good. This is because it creates an interesting field of focus on the image, which gives it more variety and makes it more interesting to look at.
For example look at this cute 5 year old. Both are candid shots but it’s easy to see how the shallow depth of field (blurred background) helps make for a more interesting image, and less distraction from what else is in the scene.


Finding Your Balance
As with most things in life, a good balance between Shutter Speed, Aperture, and ISO is best. Although there are times where you need to fix or set one of them in order to get the results you want.
A DSLR or Mirrorless camera in conjunction with your lens lets you control these three elements in order to capture the shot you want.
Every advanced camera has a Manual mode that allows you to change these 3 by rotating dials on the camera. There are also Shutter and Aperture modes, where you only control 1 of these and let the camera take care of the other 2.
See this example of the dial from a Nikon Z5. Each brand is a little different looking but will have these same options.

This Aperture Infographic from Smashing Camera helps visualize the relationships between the amount of light available and the shutter speed to use in relation to the size of the aperture. It also shows the aperture’s relationship to an image’s depth of field.
What Do the Numbers On a Camera Lens Mean?
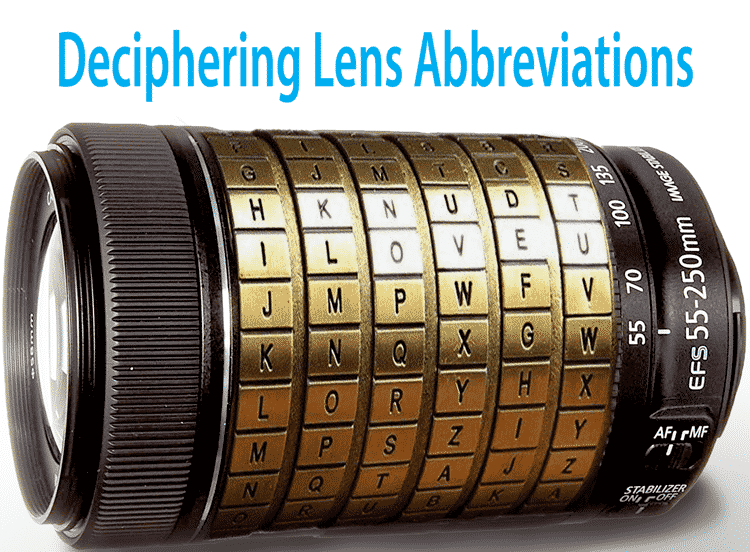
If you thought DSLR and Mirrorless Cameras had confusing terms, you haven’t seen anything yet! Until you get the hang of it in order to understand what the numbers on a camera lens mean you’re basically going to need one of those cryptex decoders from the Da Vinci Code.
So here’s your decoder for lens abbreviations and terms
So what do the numbers on lenses mean after all? Since here are all sorts of brands and they all name their features a little bit different, it gets confusing without having a guide.
With so many different brands (including third party lens) there’s an alphabet soup of letters and numbers on camera lenses.
Even if you’re a beginner in photography with the guide below it should only take you a couple of minutes to understand what every lens was designed for.
Remembering it may be a different story :). But just make a bookmark of this page or download and share one of the table references below.
Key Lens Features
First, we’ll cover the most important parts that all lenses share. So you can get a feel for what this looks like we’ll use some real lens examples.
Example #1: Nikon 55-200mm f/4-5.6G ED IF AF-S DX VR

Brand Name: Pretty self-explanatory, the brand’s name is always first (Nikon)
Focal Length: The shortest and longest focal length (if it’s a zoom) the lens offers. In our case, 55mm is the widest and 200mm is the longest (55-200mm).
Aperture Size: Bigger apertures let in more light, and it’s usually reserved for more expensive lenses. In this Nikon example, the widest aperture is f/4 (available at 55mm), but when you zoom all the way to 200mm, the widest is now f/5.6. (f/4-5.6)

Example #2: Canon EF 50mm f/1.4 USM

This is a prime lens, meaning there is no zoom. That’s why there is only one number in the focal range.
Focal Length: Since this is a Prime, the Canon 50mm is always at 50mm. If you’re not familiar with this type of lens you may think they aren’t as good as a Zoom. However, Primes usually contain higher quality elements and therefore give better image quality.
Aperture Size: Another advantage of Prime lenses is the ability to use large aperture values! In this example the f/1.4 is perfect for low light and blurring the background. (It’s next to impossible to make a Zoom lens with the same size aperture, or at least it will cost you a lot more.)
Now that we got the lens name basics covered, it’s time to go through the most common lens acronyms, abbreviations, and terms for each camera lens brand.
If you’re not familiar with the different lens companies we cover them more in-depth below.
Lens Mount Compatibility
When determining the compatibility of a lens with your camera usually the first thing you need to do is determine what kind of lens mount your camera uses.
This starts with knowing if you have a Full Frame sensor camera or a Crop Sensor (APS-C) camera. If you’re not familiar with the what Canon APS-C means our sister site, Smashing Camera, has a great explanation of the details and how it affects your photographs.
With some brands, like Nikon and Sony, the physical attachment of the lens will work on both Full Frame and APS-C cameras. However, lenses are still designed for these different sensor types.
For example, a Nikon DX lens (meaning it’s made for an APS-C camera) and a Nikon FX lens (meaning it’s made for a Full Frame Camera) will both fit on a Full Frame Nikon Camera. This is because they both use the physical Nikon F-Lens Mount.
Although if you put a DX lens on a Nikon camera with a Full Frame sensor you’re going to get vignetting around the edges of the image.
Vignetting is a reduction in the brightness or saturation of an image around the edges. While this can be a nice effect for a final image it’s usually something you’ll want to add in post processing rather than from the original image.
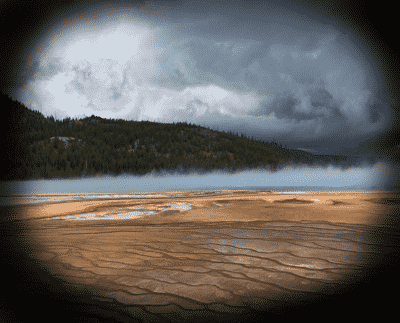
Although you can go the other way. Meaning using a Nikon FX lens on a APS-C camera, without vignetting or other similar issues. All FX lenses are compatible on APS-C cameras. And although DX lenses fit on Nikon Full Frame cameras we wouldn’t recommend buying a lens to do that.
Now if you already have a DX lens go ahead and use it on a full frame camera, but if purchasing a lens, buying used lenses , or renting a lens you might as well get a FX lens.
Buying Tip
Even though Nikon and Sony have the same physical lens mount for their Crop Sensor cameras (APS-C) as do their Full Frame cameras, you can save some money by buying a specifically designed APS-C lens.
As mentioned above a lens designed for a full frame camera on either of these brands will fit an APS-C camera. Although lenses designed for Full Frame are generally more expensive.
So finding an APS-C specific lens can save you some money.
Although if you feel like you may ever upgrade to a Full Frame camera in the same brand, having all Full Frame designed lenses is a little more future proof.
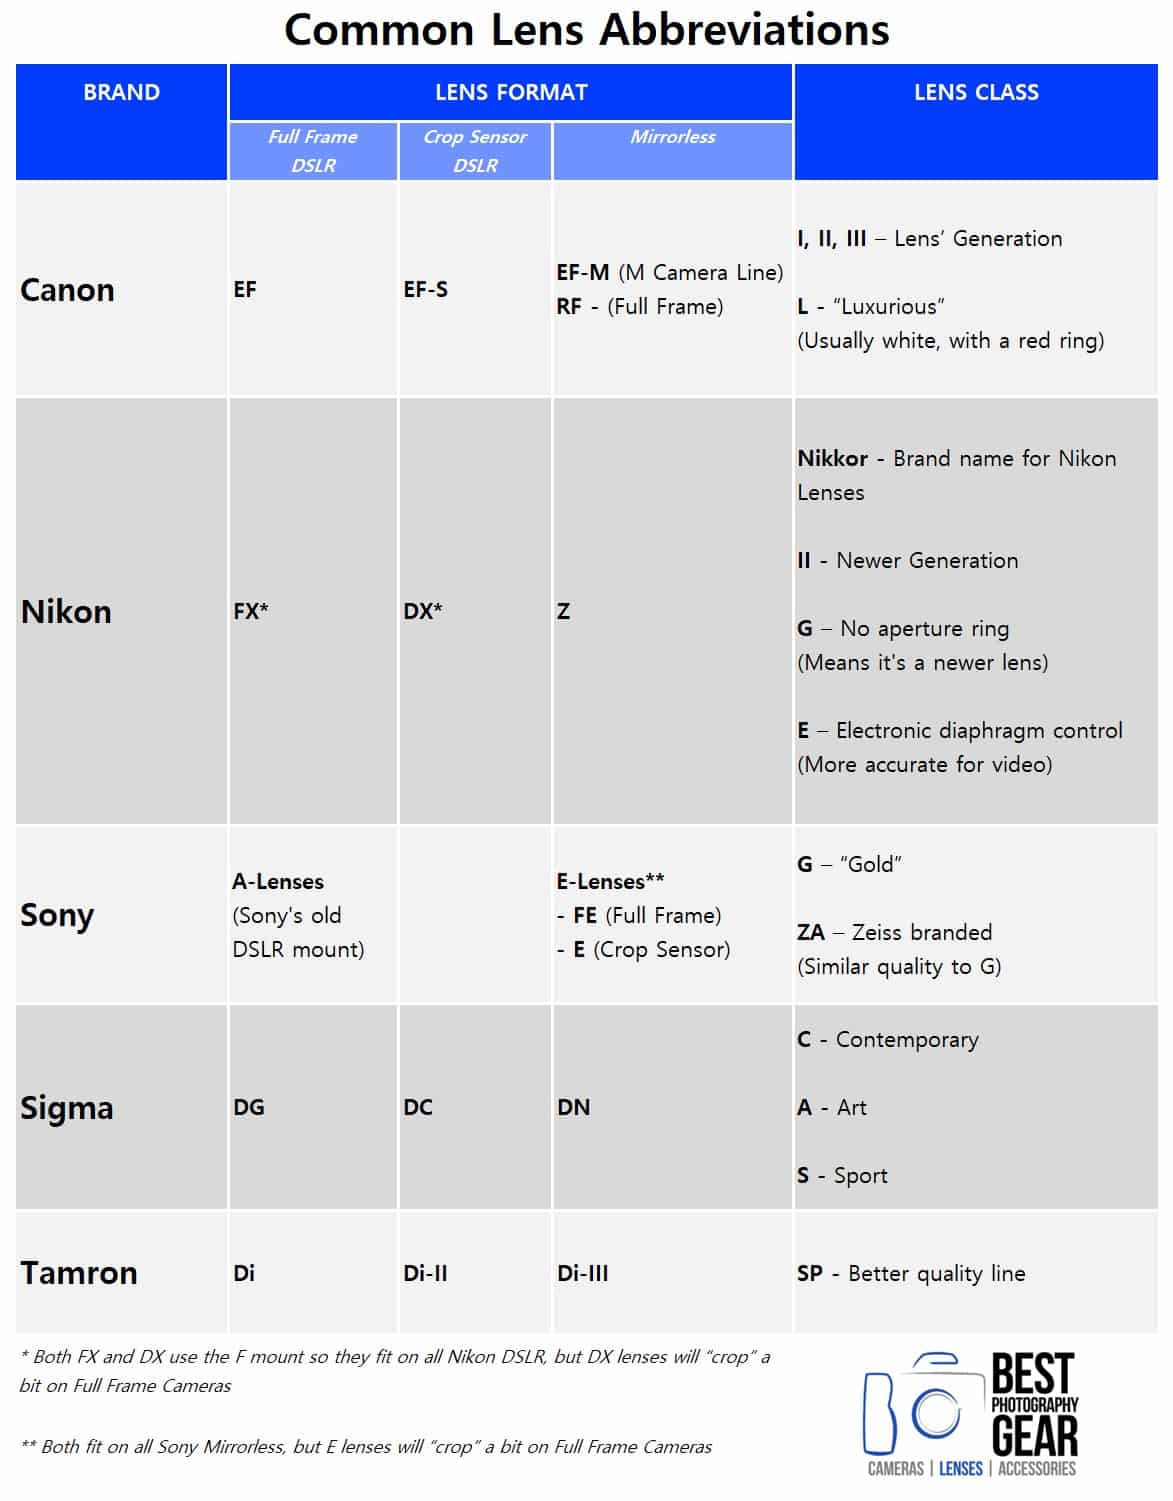
Common Lens Abbreviations
The table below provides a quick overview of the most common lens abbreviations you’ll see for the different lens brands. Then we cover each lens brand in more detail.
Canon Lens Abbreviations [Explained]
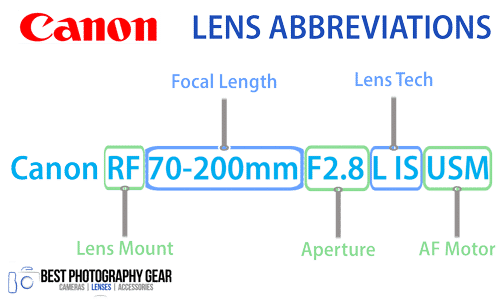
Canon uses some unusual terms that you will come across when looking for lenses. They are either related to the mount, focusing or elements used.
It’s important to understand that Canon has a different lens mount based on the type of sensor the camera uses. Also DSLR lenses won’t work on Mirrorless cameras (or visa versa) unless you use a converter.
Canon Terms to Know
Lens Mount Terms
- EF – Standard Canon lens mount, fits on all of their DSLR cameras
- EF-S – Only fits on APS-C type models (ex: Rebel T3/1100D to EOS 7D)
- RF – Refers to the lens mount for their Full Frame Mirrorless camera models (ex: EOS RP, R5, R6)
- EF-M – Designed for Mirrorless APS-C cameras (ex: EOS M50)
Lens Technology Terms
- IS – Image Stabilization, helps you at getting clear shots when using slow shutter speeds
- USM – Ultra Sonic Motor, makes auto focusing quiet and more precise. Never a bad thing to have, but not a requirement for good focusing!
- STM – New focus motor, also designed to be silent which is useful for video recording
- DO – Diffractive Optics, allows Canon to make long lenses shorter and lighter
- L – This is how Canon calls their most professional lenses (build and image quality are top notch).
Nikon Lens Abbreviations [Explained]
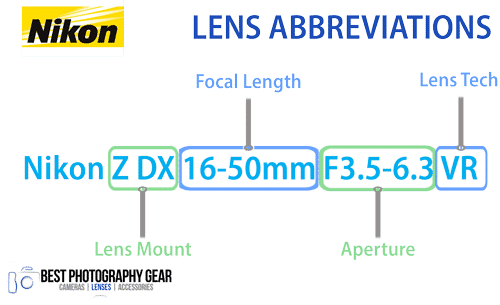
For those of you who shoot Nikon, things get a little bit more complicated. Most of their entry level models do not have an auto focusing motor built-in, so keep that in mind when shopping for a new lens.
Nikon does use a universal F-Mount for their APS-C and Full Frame DSLR’s but remember to take into account the limitations we discussed above.
Nikon’s Mirrorless line of cameras use a different Z-Mount, so DSLR and Mirrorless lenses will not work interchangeably without an adapter.
Nikon Terms to Know
Lens Mount Terms
-
FX – Fits and works perfectly with all Nikon’s DSLR cameras
-
Z – The type of lens mount for their Mirrorless Camera line (ex: Z50, Z6, Z7)
Lens Technology Terms
-
VR – Vibration Reduction, does the same thing as Canon’s IS
-
SWM – (Silent Wave Motor) Just like Canon’s USM
- AF – Stands for Auto Focus
-
AF-S – If a lens has an AF-S motor, it will focus properly with all DSLRs. If there isn’t any, then you will have to focus manually on the majority of DX models.
- AF-P – Auto Focus with Stepping Motor, this is not compatible with older models.
-
G – The lens has no aperture ring, meaning this is a newer lens
-
ED – An extra dispersion element to improve image quality
-
IF – Internal Focusing, the lens doesn’t move while focusing (great for using polarizing filters)
-
N – Nano Crystal Coating, another feature to reduce optical issues
- Micro – Nikon’s term for a Macro Lens
Sony Lens Abbreviations [Explained]
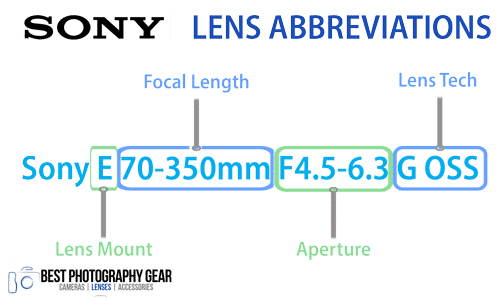
Sony kind of skipped over the DSLR technology and went straight to Mirrorless.
You will see a limited selection of older Sony DSLR cameras that use the A-Mount but everything else is for the Mirrorless E-Mount.
Similar to Nikon, Sony has a universal mount between their APS-C and Full Frame camera lines.
Sony Terms to Know
Lens Mount Terms
-
FE – Fits and works on all Sony Mirrorless cameras that use the E-Mount, though designed for Full Frame cameras (ex: A7 series, A9)
-
E – Not to be confused with the “E-Mount”, but these lenses are designed for APS-C models (ex: A5000 and A6000 series )
Lens Technology Terms
-
G – For Sony it refers to “Gold” line, meaning their highest quality lens build
-
ZA – Zeiss branded lenses, have a similar level of quality to G lenses
- SSM – SuperSonic Motor, a type of ultrasonic motor used for fast and silent autofocusing
-
OSS – Optical SteadyShot, which is Sony’s term for Optical image Stabilization
-
ED – An extra dispersion element to improve image quality by reducing chromatic aberration
Sigma Lens Abbreviations [Explained]
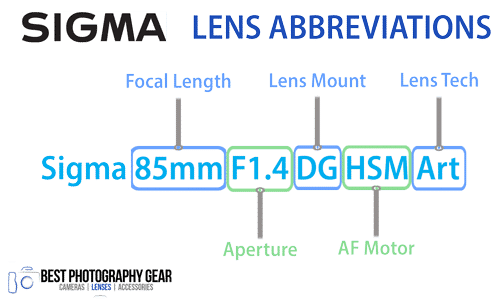
As one of the most well-know third-party lens manufacturers Sigma makes lenses for all of the major camera brands.
So if you’re buying a Sigma lens just make sure you’re getting the one specific to your camera, which is usually called out as being compatible with the lens mount. Such as Canon EF, Nikon FX, Sony E, etc.)
Simga tries to make it a little easier by grouping their lenses into one of three product lines.
- C – Contemporary. In this line you’ll find more general/everyday use lenses.
- A – Art. Here you’ll fine really fast Primes and lens quality that is comparable or better than the major brands.
- S – Sport. These are focused on quality telephoto (aka: long range) lenses, mostly used for Sports and Wildlife photography.
Sigma Terms to Know
Lens Mount Terms
-
DG – Designed for Full Frame DSLR or Mirrorless cameras
-
DC – These are meant for APS-C DSLR or Mirrorless cameras
- DN – Meant for Compact System Mirrorless Cameras, think APS-C and Micro Four Thirds cameras like Olympus and Fujifilm
*You’ll often see two of these terms called out on a Simga Lens, which just means they make a version for each type, or it’s compatible with different types (similar to Nikon and Sony).
Lens Technology Terms
-
ASP – Aspherical Elements, means it provides better image quality
-
HSM – Hyper Sonic Motor, provides more silent, accurate and faster focusing
- SSM – SuperSonic Motor, a type of ultrasonic motor used for fast and silent autofocusing
-
OS – Optical Stabilization, just like Canon IS or Sony OSS
Tamron Lens Abbreviations [Explained]
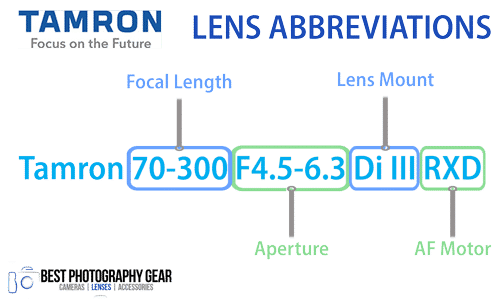
Tamron Terms to Know
Lens Mount Terms
-
Di – “Digitally Integrated”. Designed for Full Frame and APS-C DSLR cameras
-
Di-II – These are meant only for APS-C DSLR cameras
- Di-III – Meant for Mirrorless Cameras, both Full Frame and APS-C
Lens Technology Terms
- AF – Auto Focus, as you might expect
- A/M – Lens provides the option for both Auto Focus and Manual Focusing
- AF/MF – Similar to A/M but there’s an automatic manual override rather than a switch
-
AD – Anomalous Dispersion. Tamron’s version of an ‘Extra Dispersion Element’ (Like Sony and Nikon’s ED) to reduce chromatic aberrations
-
BIM – Stands for ‘Built-In Motor’ so you can auto focus even if the camera doesn’t have an auto focusing motor
- HID – Refers to a higher quality glass, ‘High Index/High Dispersion Glass’
- RD – Rounded Diaphragm. Helps the shape of bokeh (lens blur) be more circular which will look smoother
- SP – Super Performance. Better quality, professional lens
- PZD – Piezo Auto Focus Drive, not quite as good as USD
- USD – Ultrasonic Silent Drive (like USM and HSM)
- RXD – Very Silent Auto Focusing Motor, better for video
- VC – Vibration Compensation, gives you better results when using slow shutter speeds (like OS or IS)
Recap of Lens Technology Terms
At this point you might feel a bit overwhelmed with all these different terms. That’s very understandable, we had to try and sort this out too to put this all together!
Our best lens guides help make it easy to narrow down your selection to the best lens for a particular camera model or type of photography.
When looking for a lens a couple of things to ‘focus on’ are:
- In-Lens Image Stabilization is better than not having it
- Make sure the Auto focus motor is compatible with your camera model
- If you're doing a lot of video consider getting the quietest focusing motor so it doesn't interfere with your recording
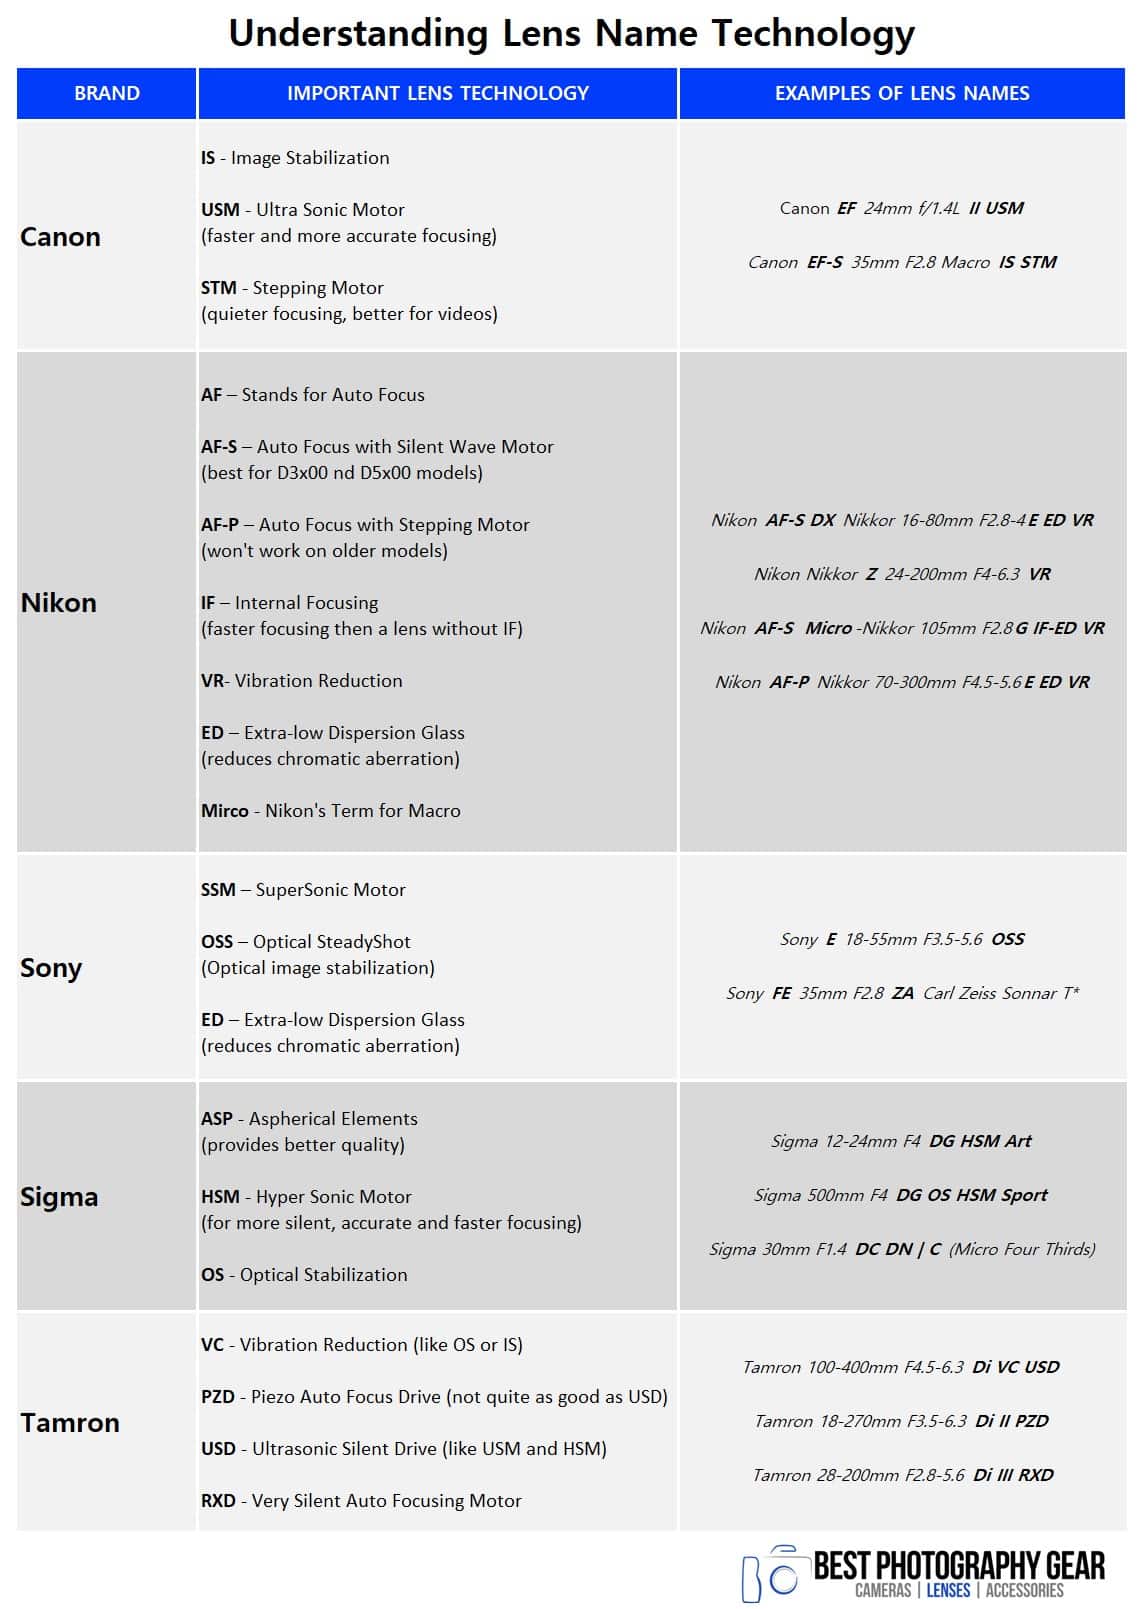
Also be sure to print out, download, or share the table below which summarizes the most important lens technology terms for each lens brand.
How to Select a Lens for Your Favorite Type of Photography
If you’re not familiar with what to look for when picking the right camera lens for your camera here are a couple reminders of what you should pay attention to.
Right up front let me say that cost is a pretty good indicator of quality.
Now this doesn’t mean that you always have to select the most expensive lenses. However, the cheapest ones will tend to give you ‘cheap results’.
In this section we are going to cover what you should look for in a camera lens for many of the most popular types of photography.
- Architectural Photography Lenses
- Astrophotography Lenses
- Candid Photography Lenses
- Car Photography Lenses
- Concert Photography Lenses
- Dental Photography Lenses
- Fashion Photography Lenses
- Food Photography Lenses
- Landscape Photography Lenses
- Macro Photography Lenses
- Pet Photography Lenses
- Portrait Photography Lenses
- Product Photography Lenses
- Real Estate Photography Lenses
- Sports and Action Photography Lenses
- Street Photography Lenses
- Travel Photography Lenses
- Wedding Photography Lenses
- Wildlife and Birding Photography Lenses
Maximum Aperture
This relates to how much light can get through the lens. It’s a bit counter intuitive but the smaller the number, such as f/2.8, means the larger the aperture. In other words, an aperture of f/5.6 would provide less light to your camera’s sensor.
Focal Length Range
Focal length is measured in millimeters (mm). It’s related to the distance from your subject but more so by the angle of view – how much of a scene is captured in your photo – rather than directly to a length to your subject.
Nikon has a great article on Understanding Focal Length if you’re looking for more information.
Prime (aka: fixed) or Zoom Lenses
Zoom lenses will give a beginner photographer more flexibility when starting out. The zoom allows you to essentially ‘instantly’ move closer or farther from your subject without having to move from your location.
On the other hand, Prime lenses tend to give you better image quality in a smaller and lighter package. However, a Prime lens is also referred to as a “fixed” lens, which means you will be the one moving closer or farther from the subject to frame the scene how you want it.
Still have Questions about the Best Lens to Buy?
We feel like these three things are the most important aspects to understand when selecting a lens but there are a lot more features you’ll come across in your lens search.
Each one of our lens guides go into more depth about why you would or wouldn’t want a particular lens.
Don’t feel like you need to spend hours searching, just ASK US! We know right were the answers are within our lens guides. And if we haven’t already covered something in one of our posts we are happy to do the research for you. Just click through to our Buying Advice contact form.
If you want to keep learning, the section below on Buying a Camera Lens covers more key features to understand. It also provides some insights into each of the different lens companies and what prices to expect.

RECOMMENDATIONS FOR ASTROPHOTOGRAPHY LENSES
| FOCAL LENGTH | APERTURE | TYPE | LENS |
| 14mm – 35mm | f/4 or Larger | Wide Angle | Zooms & Primes |
With Architectural photography the most important aspect is understanding and controlling the perspective. Some times that in relation to a detail shot of an arch or building feature, while other times it’s while your trying to capture a large building.
Ultimately the objective of Architectural photography is usually to capture the feel, emotion, or history of a building or structure. So make sure to take some time learning about the buildings history and features to try and plan what might be most impactful.
Often a tripod and long exposures are used to get crisp detail as well as blur people or cars that would be distracting otherwise. Having the blurred motion also creates a nice contrast between the fixed structure of the building.
A tilt/shift lens is one option you can consider. You may also need to plan on some post-processing to stitch images together.
Depending on your availability it’s a great idea to visit the same building or structure and photography it at different times of day and night. Also consider different seasons or weather conditions if you can. This will help you discover different aspects of the building you may not see otherwise.
For example, at my work there’s a big logo wall at the entry of the building. When I work late I see the whole wall lit up brilliantly, but during the day it’s much less noticeable.
You’ll generally want to have a smaller aperture when shooting so that the whole scene is in focus, so a lens with f/4 is generally fine, unless you’re trying to shoot low light without a tripod.

RECOMMENDATIONS FOR ASTROPHOTOGRAPHY LENSES
| FOCAL LENGTH | APERTURE | TYPE | LENS |
| 14mm – 35mm | f/2.8 or Larger | Wide Angle | Primes |
Since the beginning of mankind we’ve looked heavenward to the stars. There’s something about the vastness of space and the countless stars that makes one think of something bigger than themselves.
So there’s no wonder why photographers want to capture the night sky’s natural beauty.
With Astrophotography you’re generally dealing with long exposures so it’s possible to get away with a smaller aperture but if you’ve got 2.8 or larger you’ll have more flexibility with the kind of shots you can get.
Star trails in particular are created with a long exposure while staying focused on a single point.
For most people, in order to start shooting you’ll just need your camera, lens, and a tripod. Those that are looking to do more “deep space” photography, for personal or scientific use you’ll need to get a telescope and corresponding mount. This will take the place of your typical lens.
For those getting started there is a simple formula to help you determine the exposure speed you need to get star trails, called the 500 rule. All you do is divide 500 by the focal length of the lens you’re using. So for example 500 / 55mm lens = 9 second exposure.
Remember that increasing your ISO is going to result in more noise so being able to open up the aperture is going to help you keep your ISO levels lower.
Lens flare is also a specific feature you should look at for the lens you are considering.
You can use a Zoom lens here but a Prime might be a better option. For a given price a Prime lens compared to a Zoom lens is going to give you better image quality and a larger aperture.
For more information check out this article on Astrophotography.
RECOMMENDATIONS FOR CAR LENSES
| FOCAL LENGTH | APERTURE | TYPE | LENS |
| 24mm – 85mm | f/4 or Larger | Wide Angle & Standard | Zooms & Primes |
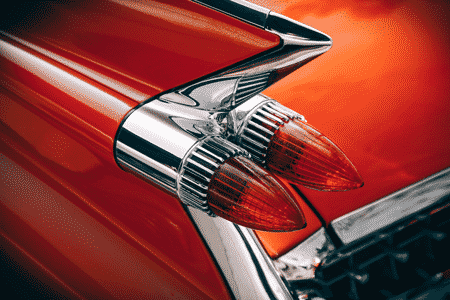
Whether you’re a Gearhead, Motor Maniac, Grease Monkey, or just someone trying to sell their car you want to consider a few things before you start snapping pictures of your car.
While your main subject is going to be the car or some detail of it, make sure you’re paying attention to what’s in your background and foreground. In particular you also need to look for any strange reflections that the car’s shiny or reflective surfaces may be catching from the surroundings.
Some of these are things you can always fix in post production, but it’s easier if you can catch it up front.
A wide angle lens is great for a variety of interior detail and exterior shoots. Although if you go too extreme with a wide angle lens you might end up creating some distortion or warping in your image.
Another popular shot is to create motion blur by panning your camera with the car as you take a picture. It takes a little practice but just set your shutter speed around 1/125s and then follow the car with your camera as it drives by and snap your shot. The car should be in focus but everything else will give you that feeling of speed.
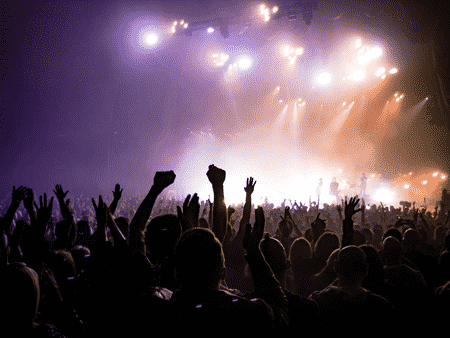
RECOMMENDATIONS FOR CONCERT LENSES
| FOCAL LENGTH | APERTURE | TYPE | LENS |
| 24mm – 200mm | f/2.8 or Larger | Wide Angle & Telephoto | Zooms & Primes |
Since most concerts are dark or indoors, you’ll need to make sure you have good low light performance. So having a lens with an aperture f/2.8 or larger is your best bet.
A larger aperture will also allow you to use a faster shutter speed, starting around 1/200 sec, to help freeze the motion and still get the correct exposure. Otherwise you’re increasing the ISO (and the image noise) or risking getting stuck with a bunch of blurry photos.
You’ll probably also want something in the telephoto range since you often won’t be able to get that close the front row..
We feel like a Zoom will be better in most cases since it’s more versatile. Often at a concert you’re stuck in a certain section or seat so it’s not easy to move around so a Prime might be tough to use.

RECOMMENDATIONS FOR DENTAL LENSES
| FOCAL LENGTH | APERTURE | TYPE | LENS |
| 30mm – 100mm | f/2.8 or Larger | Macro & Standard | Primes |
Dental photography is a great way to help communicate with patients about the work you’re planning to do.
A true Macro lens, meaning it is NOT a Zoom, would be the best option, although a Standard lens would work as well. The benefit of a Macro lens is that it will give you a 1:1 ratio so for up close photography it more clearly reflects reality.
Having some great before and after shots also is a great communication tool to provide to future patients about the services you provide and the quality of work you do.
Make sure to get full consent from your patients before using any of their photos for marketing purposes.
An external ring flash that you mount to the front of the lens will give you higher quality results. In addition you should invest in some Intraoral mirrors to help you get the correct angle for occlusal and buccal images.
For additional information there’s a great article at Guide to Dental Photography – Decisions in Dentistry
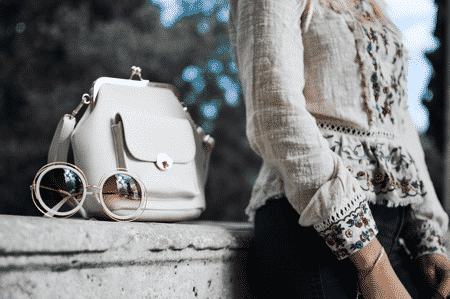
RECOMMENDATIONS FOR FASHION LENSES
| FOCAL LENGTH | APERTURE | TYPE | LENS |
| 20mm – 100mm | f/2.8 or Larger | Standard & Telephoto | Primes & Zooms |
Whether you’re capturing the latest fashion trends or vintage styles you’ll probably need a mix between close up product shots and models.
If you plan on a lot of close-up product shots then you should consider a Macro lens. Although if you’re going to be a mix of photography and you only want to have one lens then you’ll want to get a good Zoom lens.
Although if you can afford a couple of Prime lenses you can get a higher quality photo with a set of some Primes.
Beyond a good lens you’ll probably also need to have some good lighting. If you’re working outdoors try for those golden or blue hours of the day. If you’re stuck with the middle of the day you’ll want to make sure you have an assortment or reflectors and a location where the lighting/shadows aren’t too harsh.
For anything in a studio, quality lights will be essential. Lighting equipment costs can add up really quickly, so consider renting some lights from a local photo shop.
If you’re doing photography with models then also planning on some sort of hair styling and makeup.
If you want more tips check out this article on Fashion Photography Tips.
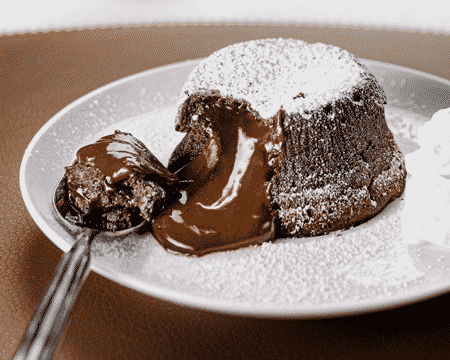
RECOMMENDATIONS FOR FOOD PHOTOGRAPHY LENSES
| FOCAL LENGTH | APERTURE | TYPE | LENS |
| 30mm – 100mm | f/2.8 or Larger | Macro | Primes |
The funny thing about a lot of professional Food photography is although it ‘looks good enough to eat’ you wouldn’t generally be able to eat it.
If you’re trying to get a shot of an amazing cake you just made to share with your audience or you’re photographing some cookies that just came out of the oven, just keep realistic expectations for yourself.
Food photography that you see on commercials and ads often use professional food stylists. And as we mentioned above they often are using tricks and non-food items to create the mouth-watering images we love to dream about sinking our teeth into.
Although we do have a couple of tips you can employ to improve your shots. Try to make sure the dishes, silverware, or other accessories match the kind of food you’re photographing. For example, shooting a seared steak with just a spoon sitting next to it is going to seam odd.
Lighting is also key. Try to find a place (weather inside or out) where you have a even lighting source with diffused light to help reduce unwanted shadows. Also beware of just using your standard household lights. The color temperature of standard bulbs may introduce odd color casting on your food, making it look unappetizing.
When stylizing your food start out with a minimalist look and then slowly add additional elements until you get a balance that you like.
Although you can use a wider focal length you’ll usually get the best results with something like a 100mm Macro lens.
For more information check out this guide for Food Photography.
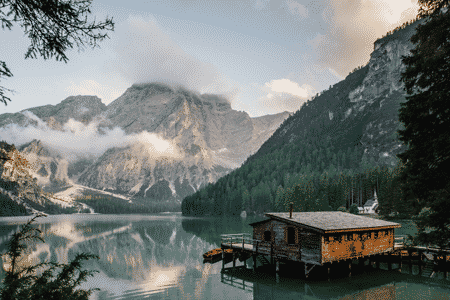
RECOMMENDATIONS FOR LANDSCAPE LENSES
| FOCAL LENGTH | APERTURE | TYPE | LENS |
| 14mm – 35mm | f/4 or Larger | Wide Angle | Zooms & Primes |
Traveling, exploring, waiting for the beautiful light and simply enjoying the time in nature can be amazing.
For landscape photography the most important factor is the focal length you choose.
You could, technically speaking, photograph with just about any lens, going with a lens with an extremely wide angle will allow you to capture so much more of the scene. Lenses under 35mm are considered wide, under 20mm is extremely wide and most commonly used for landscape photography.
If you want to get images with wildlife or isolate a specific subject then consider a telephoto lens.
With landscapes you don’t usually shoot at f/2.8, at least not when trying to achieve a small depth of field. Since this is more or less a norm for landscape photography most photographers shoot between f/5.6 and f/16 because you want everything worth shooting.
Although some purists, or Ansel Adams fans, would push you towards f/64 for a sharply focused image.

RECOMMENDATIONS FOR MACRO LENSES
| FOCAL LENGTH | APERTURE | TYPE | LENS |
| 30mm – 100mm | f/2.8 or Larger | Macro | Primes |
In technical terms Macro photography refers to capturing an object on your camera sensor at a 1:1 ratio. This essentially makes small objects look bigger. That’s because other lenses represent objects at a ratio of about 1:2.8
Although you’ll often see the term “Marco” (or “Micro” for Nikon) in the lens name to help identify the type of lens, you’ll also want to make sure it’s a Prime lens. Many Zoom lenses will call out that they are a Macro lens but they are not a true one.
Since you are essentially enlarging the detail of an object you have to really pay attention to the details of your subject and its surrounding.
This also extends to planning your shots and dialing in on just the right plane of focus. Any camera shake will also be magnified so using a tripod or having in-body or in-lens stabilization are great tools.
RECOMMENDATIONS FOR PET LENSES
| FOCAL LENGTH | APERTURE | TYPE | LENS |
| 70mm – 200mm | f/2.8 or Larger | Telephoto | Zooms & Primes |
Depending on the demeanor of your pet it may be challenging to get them to stay still for a staged shot. So you may consider getting some candid shots of your pets doing what they love, playing with their toys or maybe running around the yard. I’m assuming we’re not talking about a fish here.
If the animal you’re photographing is not yours then you’ll want to spend some time getting to know the animal. Try to get a feel for how the animal reacts to different stimuli and if you can ask lots of questions of the owner.
Make sure you know their favorite treat too!
Personality of the animal is a huge factor in the best type of lens to use, although you can always work with what you have. If you’re planning on candid shots a good Zoom lens will help you quickly frame a shot as you react to the moment. While a Prime is generally going to give you a sharper image if you’re able to slow down a bit and move into the position you need to.
Either way, you’ll want to make sure you have a good autofocus. You probably won’t have a lot of time to dial in with a manual focus.

RECOMMENDATIONS FOR PORTRAIT LENSES
| FOCAL LENGTH | APERTURE | TYPE | LENS |
| 50mm – 200mm | f/2.8 or Larger | Telephoto | Primes & Zooms |
Before you even pull out your camera you should take some time getting to know who you’re going to be photographing. Even if you’re working with a model and have a specific vision for what kind of shot you want, make sure to spend some time talking with them and communicating what you’re trying to do.
Good portrait photographers capture or evoke a sense of emotion in their images. This is a lot easier when you understand the personality of your subject.
Lighting is one of the best tools you have to communicate the feeling of your picture. After all, photography is about capturing light. Often you’ll want a nice diffused light source, which is why the “golden” or “blue” hours are so popular. You can also achieve this in a studio with good lighting equipment. Although don’t forget to experiment with strong lights or shadows to add more drama or contrast to a shot.
One of the best ways to get great shots requires a lot of work before you ever get to a shoot. Spend time looking at other’s portrait photography. This will give you a sense for what you like, as well as what you might want to avoid.
You can even make your own personal gallery or clipping of compositions and poses that you like to have a future reference.
Some of the best results come when you’re able to capture genuine reactions and expressions. Don’t try to force this. Just be patient. As your subject sees that you’re not hurried or anxious they too will start to relax and open up.
Most photographers will use a 50mm or 85mm Prime for portraits. Below we have a quick breakdown of the focal lengths we recommend.
35mm lenses – Great for group shots or for showing more than just your subject isolated (perhaps their workplace, the environment, streets, nature and so on).
50mm lenses – Ideal for full body shots and casual shooting
85mm lenses – Perfect combination of focal length and bokeh, and are also most usable for head shots
135-200mm lenses – Best for when you can’t be too close to your subject, or you’re looking for the most background blur and flat faces due to such long lengths
Having a lot of posing ideas in mind is key. One simple trick is to have your subject do a 2/3 turn away from the camera, rather than looking at you straight on. If you need some ideas here are a bunch of great examples of poses.
A couple other reminders. Try and have them hide their hands. This can be in their pockets, under their chin, on someone’s shoulder, etc. This will help make their face the focus of the image. Also have them slightly tilt their chin down to avoid nostril shots.
RECOMMENDATIONS FOR PRODUCT LENSES
| FOCAL LENGTH | APERTURE | TYPE | LENS |
| 50mm – 100mm | f/2.8 or Larger | Standard & Telephoto | Primes & Zooms |
Even before the pandemic there was a big increase in e-commerce. So more than ever people are getting into Product photography to capture images for product placement on Amazon or to showcase hand-made gifts on Etsy or other sites.
Many people will just grab their cell phone to get some shots but if you want to stand out from your competitors then getting some high quality shots with your DSLR or Mirrorless will really help you stand out.
Consider if studio shots, most often seen as the product with a white background, or a life-style shot, that shows the product in use or some sort of scene, is best for your product. As with any marketing material make sure to think about your target audience and what you want to communicate.
Standard lenses are a good fit here since they will help show your product without distortion. Since 50mm is very close to our natural field of view it’s a popular choice. Although something a little longer can help give you a nice smooth bokeh background to keep the focus on your product.
Some gear to help assist you with your product shots are a table tripod, a photo light box or a white backdrop, and some metallic reflectors.
These tools will help you get clean product shots with a clean simple background and control the lighting so you’re not getting distracting shadows and focus the light in the right places.
You need to make sure to really pay attention to the details of your shots or you’ll be stuck doing a lot of post photoshop work.
A quick tip for a white background shot is to use something like a large white poster, sometimes referred to as a “sweep”. Make sure to set it up so that it curves from your table up to a wall. This way you won’t have any horizontal lines in your shots.
In addition to your main light source use a fill light to soften the natural shadows. A fill light is a less-intense source of light to complement the primary one. Just make sure to be mindful of the color temperature (i.e.: warm light, cool light) so it doesn’t cast odd colors. You can also use reflectors to direct and bounce the light from your main source.
For other great tips on setting up Product Photography shots check out this article.
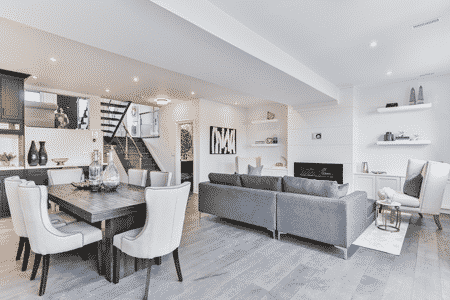
RECOMMENDATIONS FOR REAL ESTATE LENSES
| FOCAL LENGTH | APERTURE | TYPE | LENS |
| 14mm – 35mm | f/2.8 or Larger | Wide Angle | Zooms & Primes |
With the popularity of sites like Airbnb, VRBO, or other short-term rental property webpages, real estate photography is no longer just for realtors.
Regardless of whether you’re trying to sell a property or get someone to rent one the intent is to capture or document the beauty and uniqueness of a space. This is both inside and out.
It’s important to try and put yourself in the mindset of your audience. What kind of emotion or feeling are you trying to convey? Comfort, warmth, simplicity, fun, luxury, space?
After you determine the emotion you’re trying to evoke you can plan your shots based on that.
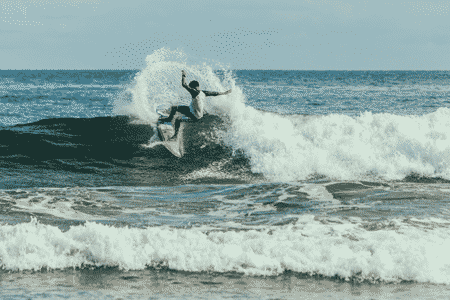
RECOMMENDATIONS FOR SPORTS AND ACTION LENSES
| FOCAL LENGTH | APERTURE | TYPE | LENS |
| 85mm – 400mm | f/4 or Larger | Telephoto | Zooms & Primes |
Sports photography can be a tricky subject to shoot.
If indoors, you need to freeze the action by selecting a fast shutter speed, but you’re often limited by the low amount of light available. Most lenses don’t have apertures big enough to let in more light so you’re left with raising the ISO speed and this doesn’t always look good.
The faster the action, the faster your shutter speed will need to be. Most often you’ll want something between 1/500 sec – 1/2000 sec.
Outside sports is a lot easier since the sun provides plenty of light. With those conditions, shooting with shutter speeds over 1/250 is not a challenge, even if the lens you use has an aperture of f/5.6.
However, if you’re going to be shooting indoors or at night you’ll want to invest in lens with an aperture that is f/2.8 or larger.
You definitely don’t want to get in the way of the game in any way. There’s nothing worse than getting heckled by the crowd for interfering in the action. And since you’re not wearing a jersey you’ll be stuck in the stands or sidelines anyway. For both of these reasons you want to have a Telephoto lens with a really good reach.
But just as if you were playing, you need to keep your head in the game. If you’re not paying attention to the game you might miss capturing an exciting moment.
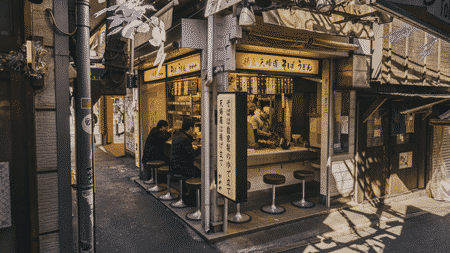
RECOMMENDATIONS FOR STREET LENSES
| FOCAL LENGTH | APERTURE | TYPE | LENS |
| 20mm – 70mm | f/2.8 or Larger | Wide Angle & Standard | Zooms & Primes |
Street photography is really about capturing moments of everyday life. However, you want your image to tell a story, so just walking down the street and snapping a shot isn’t really what it’s all about.
To truly tell a story of everyday life you ideally would be familiar with everyday life in that area. So spend some time exploring and observing an area before just pulling out your camera. This is going to require patience and persistence but it can really pay off.
Although it’s not a requirement, if you’re willing to approach and talk to total strangers, you can get some more compelling images.
In many countries you’re okay to take pictures of people in public spaces. However, that doesn’t mean people won’t be upset if they notice you taking a picture of them. Make sure to be respectful of someone’s privacy and be willing to apologize if you intrude into someone comfort level.
Be particularly aware of this with any photographs of children. You’re best bet is to ask permission of their parents or guardian before snapping shots.
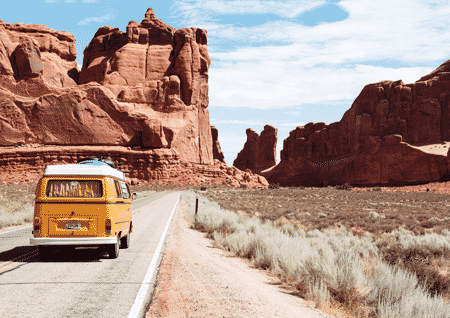
RECOMMENDATIONS FOR TRAVEL LENSES
| FOCAL LENGTH | APERTURE | TYPE | LENS |
| 14mm – 300mm | f/4 or Larger | Wide Angle & Telephoto | Zooms & Primes |
Traveling is such a broad term that you’ll want your lens focal length to match. In other words, you never know what you’re going to come across so you want a lens or set of lenses that gives you a lot of versatility.
For many people this will translate to a Zoom with a good range. Although for others it may be one or two really light-weight compact Prime lenses. In either case, you’re not going to want to worry about carrying around a bunch of gear.
So when you’re packing your gear think “carryon” rather than “moving van”.
Since you’re packing light you most likely won’t have a tripod with you. Ensuring you buy a lens with image stabilization is recommended. Just remember that optical stabilization doesn’t prevent motion blur, only a fast shutter speed will do that.
Before your trip it’s a good idea to do a dry run with your planned setup. That way you can ensure you have the gear you need and also see what you can get away with not having.

RECOMMENDATIONS FOR CANDID LENSES
| FOCAL LENGTH | APERTURE | TYPE | LENS |
| 70mm – 200mm | f/2.8 or Larger | Telephoto | Zooms & Primes |
Candid photography is about trying to capture an event or individual without interfering with what is naturally happening. So no posing or directing but just capturing the spontaneity of the moment.
Make sure that you understand privacy laws and permissions for being photographed is still required in certain cases.
So the best way to achieve authentic images is to just be as discrete as you can by using the right gear. Small, compact equipment or telephoto lenses that let you capture the image from a distance.
Since a flash is usually a dead give-a-way you should also consider a large aperture to allow you to get enough light for the correct exposure.
RECOMMENDATIONS FOR WEDDING LENSES
| FOCAL LENGTH | APERTURE | TYPE | LENS |
| 20mm – 200mm | f/2.8 or Larger | Telephoto | Zooms & Primes |
Weddings are one of those lifetime events for couple. Marriage is a divinely inspired relationship that continues and creates family ties that are central to our life here and beyond.
No pressure right? 🙂
I say that a little ‘tongue in cheek’ but in reality I do hold marriage, which starts with the wedding, as a really sacred experience. So if you’re trying to capture such a special event you’ll want to be as prepared as possible.
You should plan on being able to get tight close ups of the bride and groom as well as shots that will capture large groups of family and friends. This is why you recommendation has such a wide focal range.
Since there isn’t a lot of time to switch between lenses a big Zoom is far more convenient. Though if your more comfortable with how things flow with at a wedding a couple of Prime lenses can help you when you want to get a specific look.
Since weddings take place both outside and inside it is best be prepared with f/2.8 lenses or even bigger.
Find the best wedding lenses for Canon, Nikon, Sony, and more.
RECOMMENDATIONS FOR WILDLIFE LENSES
| FOCAL LENGTH | APERTURE | TYPE | LENS |
| 200mm – 600mm | f/4 or Larger | Telephoto | Zooms & Primes |
And you thought finding your spouse was about being in the right place at the right time. Wildlife photography definitely requires some persistence and a bit of luck!
One way to help you get in the right place it to be prepared with a long Telephoto lens. Unless you have your ninja black belt you probably won’t have a lot of luck trying to sneak up on a wild animal without disturbing it. So a long focal length will help get you as close to your subject as possible.
For a similar reason we prefer Zoom lenses here. It just allows you to frame your shot without so much moving around.
Other important feature to consider are a fast auto focus and weather sealing so you’re prepared for all sorts of conditions. (Just remember a lens with weather sealing, when your camera isn’t weather sealed doesn’t do much good).
It’s also nice to have an aperture that’s big enough to be used when there is not a lot of light. Animals are often the most active in dusk and dawn.
But above all remember to respect the Wildlife. Not only do you not want to disturb their natural behaviors but you want to keep yourself at a safe distance.
Best Lenses For:
What to Know Before Buying a Camera Lens

Since we’ve covered a lot of the key terms and features already in this article we’ll just give you a summary of the most important things to understand before you buy a camera lens.
These 10 easy to follow steps come from our sister site, Smashing Camera.
- Decide what Type of Photography you want to do
Each type of photography requires a set of lens features that make it easier to capture what you want to. For example, wildlife photography is much easier with a longer focal length so you can photograph a distant subject. - Determine your Camera Mount type
This is generally determined by the brand of camera you have, but also the body type, such as DSLR vs. Mirrorless.
Compatibility has to do with both the physical fit of the lens on the camera’s mount as well as compatibility of the features of the lens, such as autofocus. - Understand the Sensor Size of your camera
If you have a camera with a crop sensor, like APS-C, then you can use both full-frame and APS-C lenses. Although you won’t get the full benefits of a full-frame lens on an APS-C.
If you have a full frame camera than you need to stick with full-frame lenses.
Again, make sure the mount and features are compatible. - Understand the Focal Length you need
This is directly related to what type of photography you prefer. Focal length can play a factor in depth of field, as well as image composition and framing the scene. - Do you prefer Prime or Zoom
This would be based on the type of photography you plan to do and how you like to work. Primes typically have better image quality for the price. A Zoom allows you to easily adjust what your capturing in the image, and may be more comfortable for a beginner photographer. - Is there a certain Aperture Size you need
The lower the f-stop number, the larger the aperture. Or in other words the more light you’ll be able to let in. Aperture size also has to do with depth of field, or how much of your scene you want in focus.
So the lower the f-stop the better. Though that also plays a big roll in the cost of the lens. An f2.8 or lower is great, but many types of photography won’t require that, which could save you money. - Determine your Budget
To determine a realistic price range for a lens you need to understand the items above. For example, Primes are generally less expensive then Zooms. However for sports photography you’d probably want a Zoom. - Select based on Quality
Don’t be tempted to buy a lens just because of price. Stick to brands with good reputations. Buying a bad lens at a ‘good price’ is still a bad purchase. - Are there Other Features you need from your lens
Consider if there are additional features you need in your lens. Such as a quiet auto focusing motor for videography, or a certain rating of in-lens image stabilization.
These features may require you to re-think your budget but in some cases are more “nice to have” features so you may be able to get by with out them. - Are you better off getting Two Lenses rather than one
Lastly, look at whether two lenses would serve you better than one. Convenience should be accounted for, although having a Prime with a large aperture and then a modest Zoom may be better than splurging for a Zoom with a really big focal range as well as a large aperture.
Remember we are hear to help. Since we can’t cover every angle and aspect of your buying decision in this article we offer free guidance specific to your questions and situation.
How much does a Camera Lens Cost?
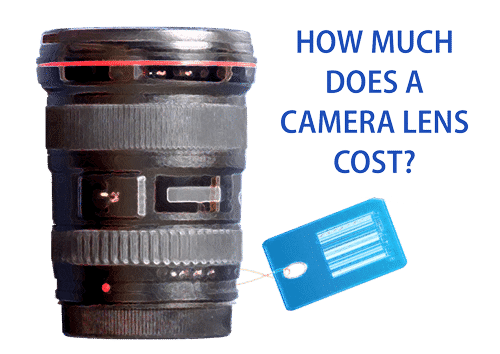
How do you know if you’re getting a ‘good buy or a bad get’?
Before talking about the cost of a camera lens you first have to understand their quality differences. That includes the final product as well as the manufacturing process.
Most consumer-grade lenses are made using mostly automated processes. This allows the companies to produce more lenses at a lower cost and faster rate. There’s nothing wrong with this. And quality lens brands have high quality control standards to ensure they are selling quality equipment.
On the other hand, these same companies are often hand assembling their professional-grade lenses. This more rigorous assembly and inspection process, coupled with higher-end materials and finishes, results in the much higher price tag.
For the individual, the choice can generally just be made based on how they are going to use the lens, for personal or professional purposes.
This video gives a quick overview and factory tour of what goes into making a Fujifilm lens.
Within a segment of lenses you’ll also find quality differences based on the manufacturer. All the lens brands we list below have a reputation for quality products and are ones we trust. And while you still will see price difference because of finishes or materials, they don’t typically comprise on the image quality.
In order for lenses to function like they do, manufactures use a lot of different glass elements to refract the light in just the right way. When this is not done well all these different pieces of glass and lens elements can create some image quality issues. Such as chromatic aberration and lens flare
Although a quality lens will be manufactured in a way and include technology, such as special lens coating, to counter-balance these issues.
Since there are many factors that go into determining the cost of a lens we’ve created a free printable to help you understand what determines the cost of a camera lens.
Camera Lens Prices
On a very general level camera lenses range from about $50 to $5000 for a single lens. Although the majority of lenses that people buy are around the these three ranges: $150 lenses, $500 lenses, and $1000 lenses.
This doesn’t mean that a $1000 lens is automatically better than a $500 lens. You really need to figure out what you want out of your lens and then get a feel for that price range.
Take cars for example. A new Porsche may look really tempting but if I’m trying to use the car to take my family of six on a road trip it’s not going to be a good investment. (Excluding the Porsche B32 Van)
Quick Tip
Whenever you buy an expensive lens you should also buy a UV filter to put on it.
This just adds an extra layer of protection to your investment. If you accidently drop the lens or bump into something the filter can save an expensive fix. Similar to a screen protector on your phone.
Once it’s on you probably won’t even know it’s there. In fact when I rented a couple of lenses to try out I didn’t even know they had a UV filter on them until I was getting ready to return them.
Aside from the 10 steps to buying a camera lens that we listed above, you should also consider the size and weight of the lens. In a lot of cases it’s like splitting hairs, such as the difference between a couple of millimeters or ounces, so don’t get too caught up in those specs.
Lens Pricing Insights
In order to get into a price range for camera lenses you really need to narrow down the set of lenses you’re looking at. Otherwise you’re going to have a really wide price range and options that will be hard to evaluate.
We created a free printable below to help narrow down the key features for the some of the most popular types of photography. We also give you a price range so if you come across a lens you’re interested in you can see if it’s in the ballpark.
How to Use the Lens Insights
- The “Average Lens Price” under each photography type will give you base line to see if you’ve found a good deal or not, in comparison to other lens options.
Remember that specific lens features, such as a larger then normal aperture, may be a justifiable reason for a lens being more than the average. - The “Typical or Average Focal Length” will give you an idea of the focal distance many of the lens have in that grouping.
- As you may notice in the “Pricing Distribution”, many high-end and professional lenses are Primes.
- From the information in the “Max Aperture Distribution” it’s tough to find a Zoom lens with an aperture less than f/2.8.
Camera Lens Companies
When selecting a lens the first thing you’ll want to determine is if it’s compatible with your camera. That usually just means the brand of your camera, but you also need to understand the type of lens mount.
What is the Lens Mount?
The lens mount is the physical attachment of the lens to the camera body. You can think of it like a iPad case, and making sure the one you buy is designed to fit your particular model.
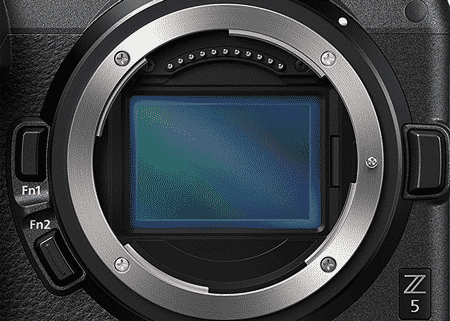
Within each camera brand their different camera models may have a unique lens mount. Some companies, like Sony, have a more universal lens mount across their camera lines. Although Canon, for example, has a different lens mount for their crop sensor and full frame cameras, as well as their mirrorless camera line.
So while selecting a Sony Lens generally means it will fit on a Sony camera, you also have some third-party lens manufacturers. Sigma, Tamron, and Tokina are three brands that we trust to create quality products.
While you won’t find Nikon making a Sony lens, or the other way around, these third-party manufacturers generally make lenses for all the major camera brands.
The major camera brands, Canon, Nikon, & Sony produce quality lenses for the most part. Although in some cases a good third-party lens may be better in quality and sharpness. They also sometimes will offer lenses in a unique focal range or aperture size that the major brands don’t make. Often they are less expensive as well.
The major brands like Canon and Nikon have very robust lens offerings but they do still have some gaps. Which is where these other manufacturers offer additional value.
As of early 2021 Nikon was still getting into Mirrorless lenses but as you can see from this screenshot there are some focal ranges that Nikon just doesn’t offer, or plan to offer a lens. Such as a Prime between 85mm and 400mm.

Click here to link to their latest information.
If you read through our various lens guides you’ll find that there’s a mix of major brands and third-party lenses based on what’s best for a given set of criteria.
When we mention that some third-part lenses are less expensive don’t assume to be saving thousands of dollars. You often can save several hundred dollars but a quality lens, no matter who makes it, is still going to cost quite a bit.
One thing that is a pretty safe bet, if you find a really cheap lens, there’s probably something wrong with it. It most likely has a low-quality build, is refurbished (which isn’t always a bad thing), or from the Gray Market.
While it’s definitely specific to the type of lens. We found the average Sigma Lens price to be 20-30% less than Canon. Then Canon’s average lens price was about 3-5% less then Nikon.
We found the average Sigma Lens price to be 20-30% less than Canon.
If you do find a Sigma or Tamron that is about the same price as a Canon, Nikon, or Sony counterpart, it may be that it has better specs. For instance, maybe a larger aperture or extended zoom range. So you may still be getting more value even if the price isn’t much different.
Different Lens Brands
You may recognize the Canon brand for products beyond just cameras and lenses, such as copiers and printers.
The company’s origins go all the way back to 1937 over in Japan. Today they are the biggest brand in cameras and lenses and have a wide range of budget DSLRs, like the well know Rebel series, as well as high-end professional cameras.
One funny thing, back in the early days their cameras actually used Nikon Nikkor lenses.
Known For: Wide Range of Camera Options and the Most Well Known Brand
Nikon specializes in many optic and imaging products.
Founded in Japan back in 1917, today it’s still one of the top camera and lens makers. It’s especially well know for it’s Nikkor lens brand.
In a partnership with NASA, they were one of the first to create digital SLRs (aka: DSLRs)
Known For: High-quality Lenses and Great Stills Cameras

Sony is probably better thought of as a consumer electronic company that produces photography gear.
Although it’s their image sensor and technology advancements that help them make some great cameras.
Sometimes thought of as the ‘innovator’ they were the first major brand to heavily invest in mirrorless cameras, which Canon and Nikon are trying to catch up to now.
Although because of this decision you won’t see any Sony DSLR’s (at least not any we’d recommend).
Known For: Excellent Auto Focus Technology Professional Video, and Image Stabilization
Although they have a small line of cameras their real value is in their high-quality lenses.
As a third-party lens manufacturer they produce lenses that are compatible with Canon, Nikon, Sony, Olympus, Panasonic, and Pentax.
Fun fact: Sigma created a mega telephoto lens know as “the green monster”. It’s 2.3 feet long and weighs 34.6 pounds (about as much as my 3 year old!). It also has a price tag of about $26,000.
Aside from “the green monster” they do produce a lot of inexpensive high-quality lenses.
Known For: Being an Affordable Alternative and Their Pro Line ‘Art Series’ Lenses
I wouldn’t hands down recommend every Tamron lens over say a Canon or Nikon lens, but there are definitely instances where I would say they have a better option.
In 2020 they celebrated their 70 year anniversary, and are considered by many as a value option.
Sony owns a percentage of the company but in addition to lenses for the Sony E mount they also produce lenses for Canon and Nikon mounts.
Known For: Another Low Price Lens Alternative
Like the other third-party lens manufactures Tokina produces a wide range of APS-C, Full Frame, and Mirrorless camera lenses.
They also produce lenses with a higher build quality and distortion control than other third-party lenses.
The feel of the lens may not be as nice as the major brands but typically the image quality will be comparable.
Known For: Budget Minded Quality Lenses Best Build Quality of the 3rd Party Lenses
Summary
With so many different aspects of photography as well as camera equipment options it may feel a bit overwhelming at first. If that’s the case then just start with step 1, ‘What type of photography are you interested in?’
From there, if you need some help figuring it out we are happy to help.
Ultimately the most important thing with photography is to just enjoy it!
If you skipped over any thing or wanted to review a section use the links below to jump back up to the section heading.
Article Outline
If you’re looking for lenses for your specific camera brand check out our lens hubs.
We cover lens guides for the top camera lenses by price, photography type, or camera model. We also have complete lens lists for the top lens brands.
First and foremost, I’m a husband and father. Then professionally I’m photographer, designer, blogger, and Esty store owner. My homebase is near the stunning Wasatch mountains in Utah but I love traveling with my family as part of our homeschooling journey. I also love teaching and helping out others. My faith is one of the biggest aspects of my life and brings be a consistent joy that I haven’t found in anything else. My main blog is BestPhotographyGear.com and I strive to make photography simple for anyone looking to learn or find gear for their individual needs. By nature, I like to study, research, and analyze things and I use that help provide the best advice and reviews I can.

